
Looking for an environmentally friendly way to use field stones? Try building some rock fence posts; in this DIY article, you’ll learn how to put in fence posts without concrete.
In the Rocky Mountain region, rocks proliferate at an incredible rate. They don’t even require water or fertilizer. Every spring, the Earth gives birth to more. We remove the rocks from the soil, but what can we do with this bumper crop of well-rounded, glacially altered lumps of ground-up ancient mountain range? Fences. Or, more accurately, rock fence posts.
Building walls from field stones is an old agricultural practice. As we started fencing our small acreage in the Bitterroot Valley, Montana, I thought about those old-timers and the durability of their stone fences. However, since we don’t have 300 years, 100 employees, or the patience of our forebears, we decided to forgo the complete stone fence and confine the stonework to posts in strategic locations: the weakest spots in fence construction, corners, gates, and terrain transitions.
How to Construct Sturdy Rock Fence Posts
Tools and Materials
Directions
Here’s our method for building a stone fence post without using cement.
- Use a small backhoe to dig out the base 2 feet deep and 20 to 24 inches wide.
- Place two 6-1/2-foot wooden posts 180 degrees apart for an inline bracing post, or 90 degrees apart for corner posts. Align the posts with the direction of the fence, so wire can be attached later. For corners where a gate is nearby or where you want extra strength, arrange three wooden posts in a triangle, with two of the posts in line with their respective fences.
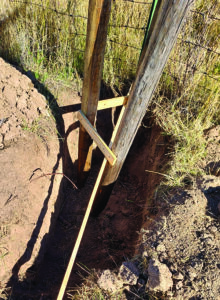
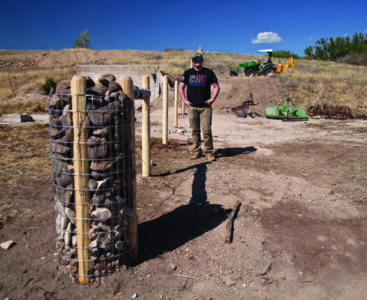
- Nail small sticks between the wooden posts to hold them in place at the correct distance apart. Then, place the posts into the hole at the site.
- With the backhoe, remove most of the rock from the excavated material. Then, have one person hold the posts relatively plumb and check the posts periodically with a 4-foot-long carpenter’s level. Have the other person place rocks around the base of the posts until the posts are somewhat stable.
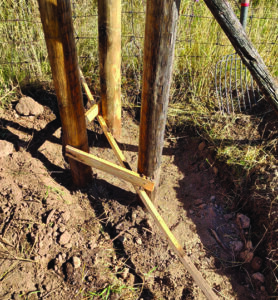
- Partially fill the hole with a mixture of dirt and rocks.
- Add water to moisten the mixture, and then compact it with a sledgehammer to tamp it down tight. Repeat this process to bring the mixture up to a level about 6 inches below grade (or 5 feet down from the tops of the posts). Level the dirt to ensure the rock cage sits plumb in the hole; otherwise, the finished rock post may lean.
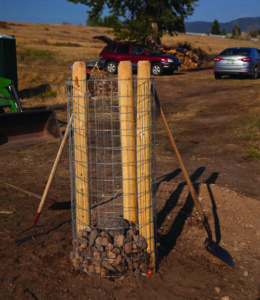
- Use 5-foot-wide, 2-inch-by-3-inch rectangular galvanized welded-wire fencing to make the outside “cage” for the rocks. Form the cages by rolling out the wire and cutting enough to make two complete wraps of wire (for a double cage). For the regular corners and inline posts, make the rolls 18 to 24 inches in diameter. After the roll is formed, tie the ends together with wire.
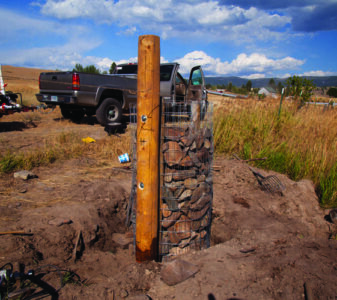
- Slip the wire cage over the wooden posts, setting it below grade (trimming off the wooden sticks or removing them as you go) so the top of the wire is nearly flush with the tops of the posts. Setting it below grade will make for a sturdier base.
- After placing the cage, check the wooden posts for plumb and adjust the cage to make sure it’s very close to plumb as well. Using a sledgehammer as a bucking bar against the back of each post for extra support, staple the cage to the posts with barbed fence staples. This will keep the cage stable as you add rocks.
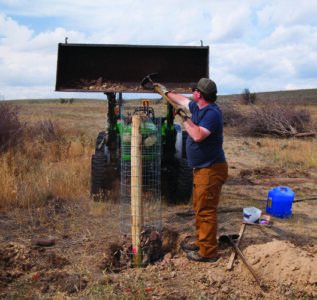
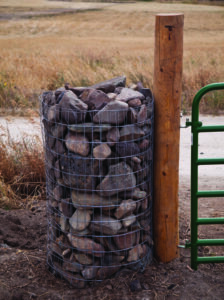
- Once the cage and posts are secure, the fun starts — picking up the rocks and placing them in the cage. Put the bigger rocks in the center, and then fill in the outer gaps with smaller stones so the exterior of the post has a pleasant, somewhat solid-looking, and smooth-ish surface. Don’t use rocks more than about 10 inches in size, because if they bounce around when they’re dropped in, they can bend the cage outward or knock the wooden posts out of plumb. A bit of extra time here will produce a better-looking finished product.
- After filling the cage, finish backfilling around the base with material left from the excavation and compact it for extra strength. This process isn’t easy, but the effort it takes is about equivalent to a trip to the gym. It takes a minimum of two people, with three being better. Currently, it takes the three of us about 2-1/2 to 3 hours to complete a post. That’s why we’re only putting them at corners, gate openings, and transitions. I don’t have enough life left in me to fence 11 acres every 16 feet!
Dependable Field Stone Gate Posts
Tools and Materials
- Nails
- 5/8-by-10-inch lag screws
- Gate hinge pins
- Backhoe
- Sledgehammer
- 7-inch-diameter, 8-foot-tall gate post
- Sticks
- 6-1/2-foot wooden posts (2)
- Rocks
- 5-foot-wide, 2-by-3-inch rectangular galvanized welded-wire fencing
Directions
Instead of using one of those fancy gates that we see around our area, with two huge posts and a large top cross piece to keep the vertical posts from leaning in under the weight of the gates, we wanted to stay with the rock post look. So, we decided to use an enlarged version of the rock post with a larger wooden post attached to the outside. Building a stone gate post follows much of the same process as that for the regular stone posts. The primary difference is that a 7-inch-diameter, 8-foot-tall gate post is used here.
- Dig the hole in the same manner as for a fence post, except wider. Arrange the sticks around the gate post so the sticks form a tripod to support the post vertically. Temporarily screw the sticks in. Place the gate post in the hole.
- Nail the two 6-1/2-foot wooden posts together with sticks and place them in the hole. Place rocks around the base of all the posts to hold them. Then, backfill the hole and compact the material used to backfill it.
- Make larger wire cages (about 29 to 30 inches in diameter) and place them over the two 6-1/2-foot posts, leaving the large gate post outside the cage.
- Fill the cage with rocks. I estimate the larger cages contain 2,000 to 2,500 pounds of rock. Once they’re set, it’d take a bulldozer to knock ’em over!
- Use three 5/8-by-10-inch lag screws to attach the larger gate post to the wooden gate post inside the cage. Essentially, the gate post will be held in place by a 2,000-to-2,500-pound rock anchor.
- Attach the gate hinge pins into the gate posts with screws, and align the gate so it’s level.
Creating such rock posts is somewhat time-consuming and laborious. However, it’s a great way to use materials at hand while simultaneously building something that’s sturdy, useful, and long-lasting.
Eventually, the lower portion of the wooden posts will rot away. By that time, I anticipate that the rock post will have settled, though not by much, and will be extremely stable, holding the upper part of the wooden posts in place for many, many years.
Ward and Kammy Thurman make their home in the Bitterroot Valley of Montana. You can follow their adventures on YouTube@sapphiremountainfarm7073.
Originally published as “Solid Stonework: Building Thrifty Fence Posts” in the March/April 2023 issue of Grit and regularly vetted for accuracy.


