
If you live in a place with rocky topsoil, you’ve likely joined the ranks of gardeners wondering how to separate rocks from dirt so they can grow food. Dana Benner has found that an electric tiller can help with tilling rocky soil, but if you’re stuck between a rock and a hard place, your best bet may be a combination of techniques.
Not all areas of the country are blessed with rich, loamy soil. In northern New England, where I live, we have to deal with the remnants of glacial retreat, meaning our topsoil is so thin that barely anything takes root, and when there’s enough soil to grow something, it’s full of boulders, stones, and rocks.
This abundance of rocky soil is one reason some of the early colonists packed up and moved away from this place, heading to “greener pastures.” Making a living from the soil here, or just feeding your family, can be a challenge. We have a standing joke that our No. 1 crop is rocks, because no matter how many you remove, you’ll always find more the following year.
New England isn’t the only area that deals with rocky soils. Other places throughout the country have similar conditions. I have a good friend on the Big Island of Hawaii who has little soil and plenty of lava rock. Learning what he goes through to garden in those conditions makes my rock problem seem not so bad.
If you’ve tried to garden in this type of environment, you’ve likely experienced the bone-jarring, teeth-rattling feeling of your shovel, hoe, or tiller blade striking a large rock or boulder. Year after year, just when you think you’ve solved the problem, the rocks seemingly take root and you have to clear them all over again. If this causes you to contemplate throwing in the towel (or the shovel), don’t. To make your garden work, you just need to reevaluate your situation and your options for how to remove rocks from the yard. After all, Indigenous people grew successful gardens in these conditions long before colonists came along. And crop-growing methods have changed a great deal over the years. With a little work and a lot of planning, you can be successful as well.
Stony Solutions: Tilling Rocky Soil
I offer this advice with plenty of experience. They call my home state of New Hampshire the “Granite State” for a reason. No matter where you dig around here, you hit rock. While my garden is only 20 by 20 feet, it’s a 20-year work in progress. I made it this size only because I got tired of hauling out large rocks.
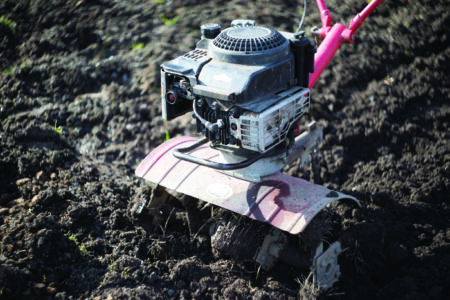
Call me stubborn, but from the start, I vowed to make my garden work despite the challenges. When I started, I turned the soil with a shovel, because I wanted to do things the old-school way, but now I use an electric tiller for tilling rocky soil. Even after 20 years, I still pull up rocks, though they do seem to be getting smaller.
In the beginning, I pulled out some huge rocks with a crowbar. I could’ve bought sifted loam, buried the rocks deeper, and then used petroleum-based fertilizers, but I chose not to go this route. I’d committed to not using harmful fertilizers, herbicides, or insecticides in my garden, and I still don’t. Besides, burying the rocks wouldn’t have solved the problem. Eventually, they’d work their way to the surface.
The first year, my efforts paid off, and I had mild success with some basic crops, but it wasn’t anything to write home about. Every year after, I’ve added organic material to my garden. The soil has slowly improved, and I see better results each year.
You can do what I’ve done and clear as many rocks as possible from your garden, but other options exist as well. What works best for you will largely depend on how much effort you want to put into rock removal. And you may find that the best solution is a combination of techniques.
Take ‘Em Out: How to Remove Rocks from the Yard
If you decide to remove your rocks, that’s great news! The bad news is that most vegetables need about a foot of good soil to be productive, so you’ll have your work cut out for you. I hope you have a lot of patience, because this is a slow process.
Turn the Soil
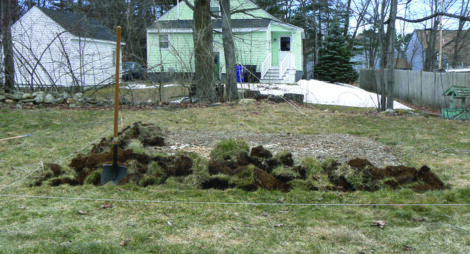
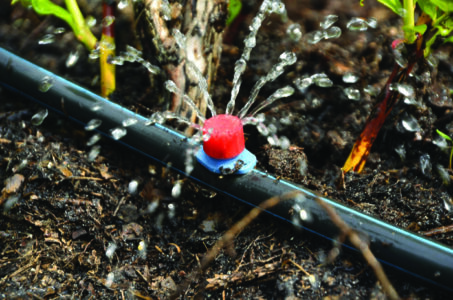
Turn the soil. You can do this with a shovel, though tilling rocky soil with a tiller or a plow will make the job easier, especially on larger properties. (I use the term “easier” subjectively, as there’s nothing easy about this job.) As you go along, use a metal-tined garden rake to remove as many of the large, visible rocks as you can, but know that you’ll never get them all on the first time through. Then, till or dig the garden area again. This second time through, you’ll find large rocks lurking just under the soil. Removing these rocks may require some real effort and take numerous days to complete, but it’s an essential step in the process. Prepare yourself for tough work. If you’re planning on a large garden, consider renting a small backhoe for this step.
Supplement Your Soil

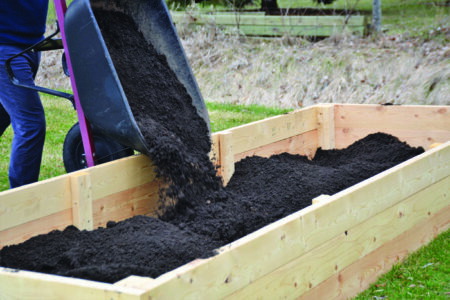
Supplement your soil. Once you’ve removed the majority of the large rocks from the soil surface and below, add compost to the area. Spread the compost across the exposed ground, and then till it in. Repeat this step over and over again, removing any rocks that show up during the process.
There’s no such thing as too much organic material in a garden. Your ultimate goal should be to build a layer of healthy soil to a depth of 12 inches or more. It can take years to reach this level; it’s not a one-and-done thing. As I mentioned before, it’s taken me 20 years to get my soil to where it is now, and I’m still not done. Don’t let the delay stop you from planting, though. Start planting as soon as you can, as the roots of your plants, no matter how small, will help break up the soil. The going will be slow, and you may not see great results right away, but each year will be better than the last.
Raised-Bed Workaround
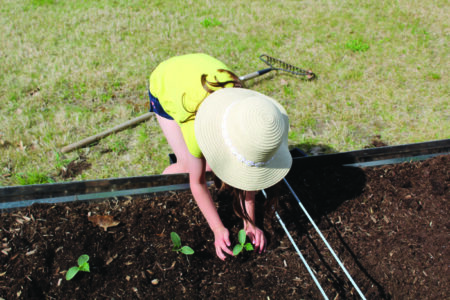
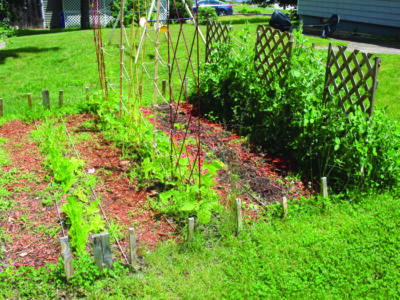
If you prefer to avoid the rocks altogether, garden in raised beds instead. You can put your raised beds just about anywhere, and they’ll make gardening easier, especially weeding and harvesting. Raised beds are also easy to make; you just need a few supplies. I made mine using scrap lumber, and lots of other possibilities exist, including buying pre-made beds. Ultimately, you just need something to hold soil and plants.
I grow my strawberries in a raised bed, and my daughter grows squash, cucumbers, peppers, and tomatoes in hers. While raised beds can solve your rock problems, they do require a few special considerations.
Proper depth
Raised beds, like standard gardens, should have a soil depth of at least 12 inches. The roots of your plants need room to spread out.
Proper soil
Regular garden soil won’t work well in raised beds, as it’ll become too dense for new root growth. You can buy soil made especially for raised beds from your local garden center; it usually comes in 20-to-40-pound bags.
Fertilizer
Raised beds need to be fertilized. You can stay away from petroleum-based fertilizer by using composted manure or other organic additives. Leaves and mulch take too long to compost in raised beds (they won’t break down for a year or so), so unless you have an established compost pile, purchase bagged organic material and add it to the soil annually. (See “Compost Considerations” on Page 58 for more information on store-bought compost.)
Water
Growing conditions in raised beds are similar to those of containers. This means plants grown in raised beds will need to be watered more frequently than those grown in-ground, because, just like potted plants, they dry out quickly. My daughter uses a soaker hose in her raised beds, which seems to work well.
Embrace the Rocks
The third option, after debating how to remove rocks from the yard and attempting these techniques, is to embrace your rocky soil and grow plants that do well in those conditions. Believe it or not, many plants can thrive in rocky soil. Unfortunately, most of them aren’t classified as vegetables. However, many herbs, medicinal plants, and edible flowers will do well. You likely won’t be able to grow all your edible plants this way, but it’s a low-maintenance option that can easily be combined with one of the other techniques mentioned. Check with your local garden professionals to find out which plants will thrive among the rocks in your area.

Compost Considerations
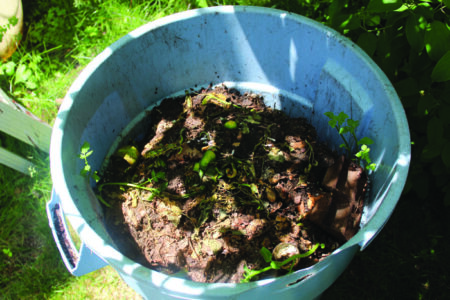
Compost is simply organic matter that’s been allowed to decompose, such as grass clippings, leaves, egg shells, coffee grounds, and kitchen scraps. Whether you make it yourself or purchase it, when added to your garden, compost is a great alternative to petroleum-based fertilizers. It’s also better for your soil and the environment.
I won’t go into detail about making your own compost, but it’s a fairly simple process that will yield great results for your garden. If you haven’t started a compost pile, consider giving it a go.
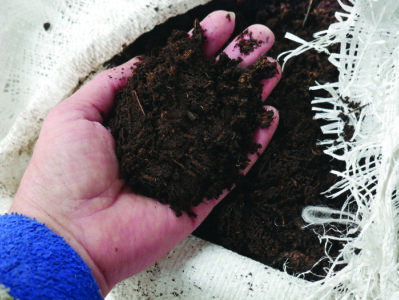
Compost that you find at your local garden center comes from many different sources. You’ll likely see composted manure, both cow and chicken; compost made from lobster shells and kelp; and a host of others. They all work, and they all can be added to your garden with no waiting.
You may be tempted to skip a step in the composting process and obtain fresh manure, but that can be disastrous for your garden. Manure needs to sit for at least a year before it’s safe to put on a garden. The decomposing process generates heat, which can cook seeds and burn young plants. (If you’re interested in learning how to safely compost livestock manure, check out “Composting Livestock Manure Creates Black Gold.”) Besides, if you spread fresh manure over your garden, don’t expect friends to come by anytime soon.
Dana Benner writes about all aspects of survival, farmsteading, and the outdoors. His work has appeared in print for more than 30 years.


