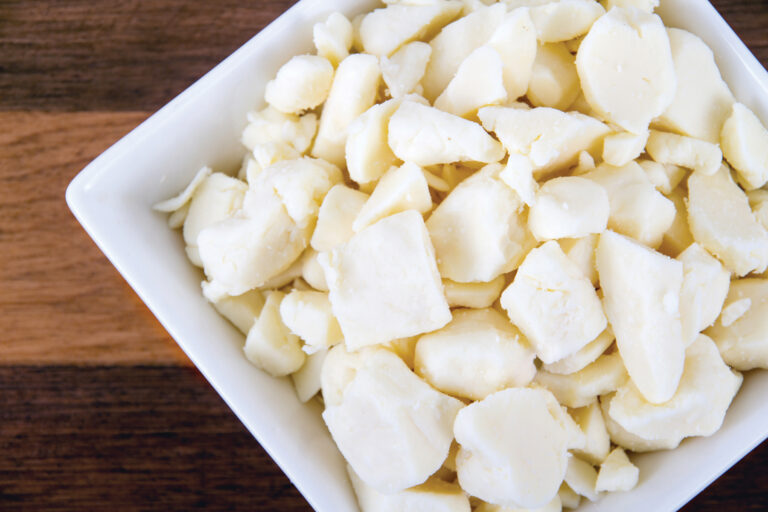
If you’ve ever bitten into squeaky cheese and wondered, what are cheese curds? Then this guide on how to make cheese curds is for you. Follow these steps, and you’ll be enjoying your own homemade squeaky cheese in no time.
The quest for a self-reliant lifestyle seems to be as relevant today as it was 30 years ago when I began my journey. While many different roads converge to bring one to a place of less dependency upon others, a major component of self-reliance for many is being able to source food locally or provide most of their food from the land they live on. Taking this a step further, many consider access to local milk to be the ultimate in food sourcing. Buying fresh milk from a small, local dairy works well for some, but for others, having a milk cow (or dairy goats) is a dream come true — the apex of the farming lifestyle!
But having access to a steady supply of fresh milk is only the beginning; learning to use that milk to make various dairy products can be as rewarding as it is comforting. Creating simple dairy products, such as butter, sour cream, yogurt, and chèvre, is a great way to begin, but soon, most people want to try their hand at more complex products, such as various types of aged cheese.
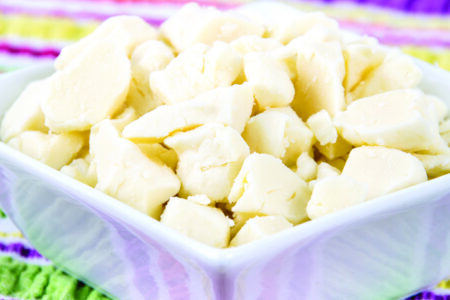
A great way to transition from simple to complex is through the process of making fresh cheese curds. So, what are cheese curds made of? Sometimes called “squeaky cheese,” the making of these fresh curds follows the same basic steps used to make cheddar cheese. Because squeaky cheese isn’t aged, it can be enjoyed immediately without a cheese press, waxing, or the cheese cave needed to make aged cheddar. Squeaky cheese is, in essence, a moister, unaged, juvenile cheddar.
A Guide on How to Make Cheese Curds
Setting up two stainless-steel pots as a double boiler is the preferred method for making cheese, as this allows for slower and more even heating of milk. However, this cheese can be made in a single pot placed directly on a heat source on a low to medium-low setting if you carefully monitor the temperature during the heating process.
The colander must fit inside the smaller pot and be suspended above the whey. You’ll use this setup to drain and cheddar the curds.
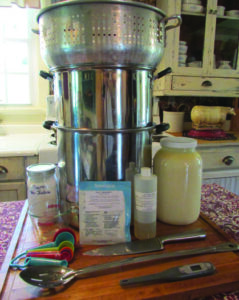
Gather and sterilize your equipment to create an environment in which the cheese culture doesn’t have to compete with unwanted bacteria. Achieve sterilization simply and effectively by scalding your pots and utensils with boiling water and making sure your countertops and cutting board are well-cleaned.
Materials
- 1 or 2 stainless-steel pots
- Long-handled, slotted, stainless-steel
spoon or skimmer - Kitchen thermometer
- Long-handled, stainless-steel knife
- Stainless-steel colander
- 2 gallon-sized zip-close storage bags
- Large cutting board
Ingredients
- 2 gallons unpasteurized or pasteurized milk (milk that’s been ultra-pasteurized won’t yield the intended results)
- 3/8 teaspoon liquid calcium chloride dissolved in 1/4 cup cool water
- 1/8 teaspoon mesophilic culture (or4 tablespoons buttermilk)
- 1/2 teaspoon single-strength liquid rennet (animal or vegetable)
- 1 to 2 tablespoons kosher salt (or noniodized salt)
If using buttermilk for the culture, make sure it contains live, active culture, as indicated on the side of the carton.
You can order powdered mesophilic starter, calcium chloride, and rennet from your favorite cheesemaking supply company. You can use either animal or vegetable rennet; this recipe is for single-strength rennet.
The high temperatures used in the pasteurization process alter the chemical construction and calcium balance in milk, which leads to reduced or no coagulation in pasteurized milk. The addition of calcium chloride restores the calcium balance in pasteurized milk. Ultra-pasteurized milk has been heated to such an extreme that the compromised calcium can’t be restored, even with the addition of calcium chloride, so ultra-pasteurized milk can’t be used to make squeaky cheese.
This recipe will offer the best results when using fresh milk from your herd or a small, local dairy. Different types of milk can cause variations in the final product. For example, a high cream content will result in a softer and more flavorful curd. Milk that’s been skimmed and had its cream removed will produce a firmer curd. Goat milk will offer a slightly different flavor and texture than cow milk, and pasteurized milk will respond differently than unpasteurized.
Ripen the Milk
Set up your pots in a double boiler fashion, with the bottom pot full of warm water and the top pot containing the 2 gallons of milk. If using pasteurized milk, add calcium chloride. Stir with a spoon to dissolve and distribute the calcium chloride throughout. If using unpasteurized milk, calcium chloride isn’t necessary and can be omitted.
Warm the milk to 90 degrees Fahrenheit and maintain this temperature. Sprinkle mesophilic culture over the top of the milk, let sit for a couple of minutes to dissolve, and then stir for about 10 to 20 seconds with an up-and-down motion to distribute. If substituting buttermilk for the mesophilic culture, add it now and stir with an up-and-down motion to distribute.
Cover and let sit undisturbed for 1 hour, keeping the milk at 90 degrees. If it falls below that temperature, you can warm it up by adding a little hot water to the bottom pot from time to time or by carefully and slowly raising the temperature under the pot. If you find the temperature hard to maintain, err on the side of slightly cooler temperatures rather than hotter. Mesophilic culture performs best around 90 degrees.
Coagulate the Milk
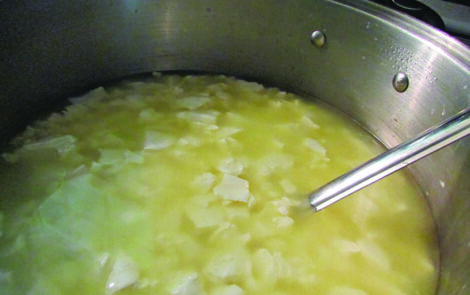
After the milk ripens for 1 hour, coagulate the milk by adding rennet. Mix the liquid rennet with 1/4 cup cool water, and pour this mixture over a slotted spoon to splatter and distribute the liquid over the surface of the milk. Mix with an up-and-down motion for about 10 to 20 seconds. Don’t stir in a circular pattern, and don’t stir longer than 20 seconds. Allow the milk to settle, and then leave it covered and undisturbed for 45 minutes. After 45 minutes, gently touch the coagulated milk. If it feels springy under your fingertips, the process is likely complete.
Cook the Curds
Check to see if the milk has set by lifting a small portion with the point of a knife. When it’s ready, the coagulated milk should break clean from the point of the knife.
Using the knife, cut through the curd vertically at approximately every 1/2 to 3/4 inch. Turn the pot and do the same in the opposite direction to make squares. Then, holding the knife at an angle, cut diagonally through the curds, cutting through to the bottom of the pot. The curds won’t be uniform. Leave the cut curds for 5 minutes to firm up a bit. Once the curds are set, lift them with a long-handled spoon, and cut through any larger pieces you missed when cutting diagonally. Make approximately 1/2-inch to 3/4-inch cubes. (Don’t worry if curds aren’t exact.)
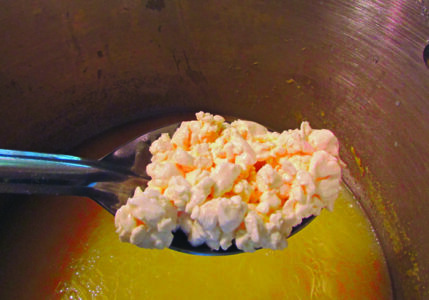
Begin to heat slowly to reach a temperature between 100 and 102 degrees over 30 minutes. Stir by lifting the curds gently from bottom to top every few minutes so all curds are heated evenly throughout the process. It’s better to heat too slowly rather than too quickly.
When you’ve reached the desired temperature after 30 minutes, maintain the temperature for an additional 45 minutes, continuing to stir the curds from bottom to top every few minutes to evenly distribute the heat. When the curds are finished cooking, they should have a slightly firm texture and bounce back when pinched gently between your thumb and forefinger.
Drain the Curds
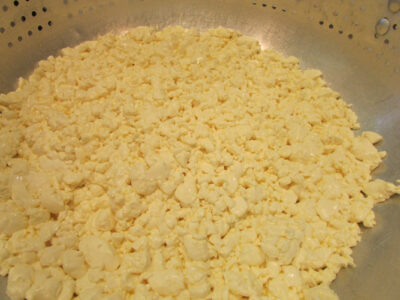
Drain the curds in the colander and save the whey, returning it to the smaller pot. Suspend the curds, still in the colander, over the warm whey. Curds should be slightly above the whey and not submerged. Pour out some of the whey if necessary to achieve the desired effect. Use the whey to maintain the temperature of the curds to the ideal temperature between 98 and 102 degrees. You’ll no longer need the larger pot of warm water and can discard it, as you’ll now use the warm whey to maintain the temperature of the curds.
Cheddar the Cheese
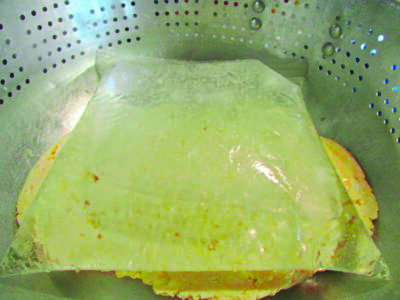
Cheddaring is accomplished by flipping the curds every 15 minutes over 2 hours. Begin by filling a gallon-sized zip-close storage bag with warm tap water. You can place the zipped bag of water inside another bag to prevent accidental leakage. Use this bag of water as a weight and place it directly on the curds during the cheddaring process. (Another option is to place a lid directly on the curds, mashing them down ever so slightly, and then place the bag of water on top of the lid. This seems to press the curds a little more evenly than using water-filled bags alone.) Let the cheese curds with applied weight sit for 15 minutes.
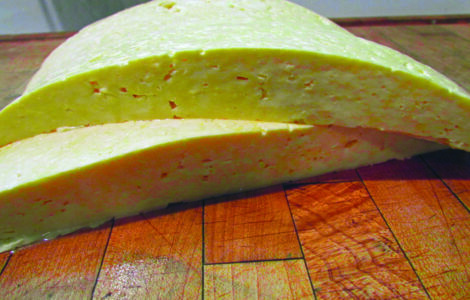
After 15 minutes, the curds should be in a solid mass, or at least be stuck together enough that they can be flipped. Begin flipping the curds every 15 minutes, keeping warm the whey in the pot under the curds and the water in the storage bags on top of the curds. After 2 hours have passed, the curds should be molded together to create a compact mass of cheese that’s suitable for slicing, with no gaps or large holes.
Cut and Salt the Finished Curds
Remove the mass of cheese from the colander and place it on the cutting board. Using the knife, cut the cheese into approximately 1-inch strips, and then cut across the strips to make 1-to-2-inch-long pieces. Return the sliced curds to the colander that’s still suspended above the warm whey. Sprinkle a portion of the salt evenly over the curds and toss gently. Allow curds to sit and absorb the salt for 15 to 30 minutes. Repeat with the remainder of the salt, and let sit for another 15 to 30 minutes.
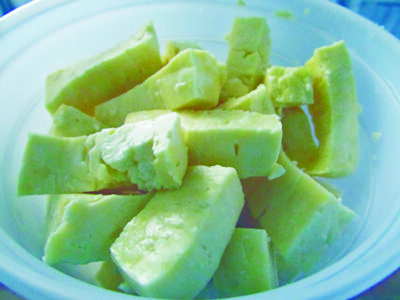
This recipe easily lends itself to making larger batches of cheese.
Making the cheese from start to finish takes approximately 5 to 6 hours. The finished cheese must be refrigerated.
Variations
To make a spicy variation of this recipe, mix diced jalapeño or other hot peppers with the curds before pressing them. Another delicious option is to add your favorite herbs and spices to the curds before pressing.
Uses for Cheese Curds
The “squeakiness” of this cheese is fun, but it’s also a temporary condition. As the bonded protein and calcium in the curds begin to break down, the cheese will lose its squeak and begin to develop a more complex flavor. The gently aged curds that remain, now devoid of the squeak, will still be great for snacking and adding to any meal. They can be used on salads. They’re delicious tossed in and cooked with scrambled eggs. Try putting cheese curds in the middle of a meatball or into hamburgers before grilling. They’re tasty on top of casseroles or pizza. They can be breaded and fried to make hot cheese curds that rival any found in restaurants. There’s no limit to how the curds can be used.

Because squeaky cheese has a high moisture content, it seldom keeps longer than a week. Making smaller batches more frequently is usually best. However, making larger batches and sharing with friends and family is an option that’s almost always well-received. They may even ask you to share your secrets for how to make cheese curds. Very few people will turn down squeaky cheese once they’ve had a sample!
Tammy Cupp and her husband, Mike, live in southwest Virginia on a 50-acre homestead in the Blue Ridge Mountains. She has been training and selling dairy cows to other homesteaders for more than 15 years. The abundance of fresh milk from the cows provides the resources for her favorite hobby, making various types of fresh and aged cheese. She enjoys sharing knowledge and seeing others succeed in their homesteading ventures.