Delve into a historic cheese created in Derbyshire, England, and learn to make a traditional derby cheese recipe or a port derby cheese.
In Derbyshire, England, as early as the 16th century, cheese was crafted by wives and milkmaids in farmstead kitchens. With a limited supply of milk available and no viable means of exportation, Derby cheese was little-known outside the region. In 1870, William Gilman built Great Britain’s first cheese factory on the estate of the Honorable Edward Coke of Longford, Derbyshire, and the local farmers combined resources and formed a dairy cooperative. A new railway system made exportation possible, and Derby cheese soon became available to all of England.
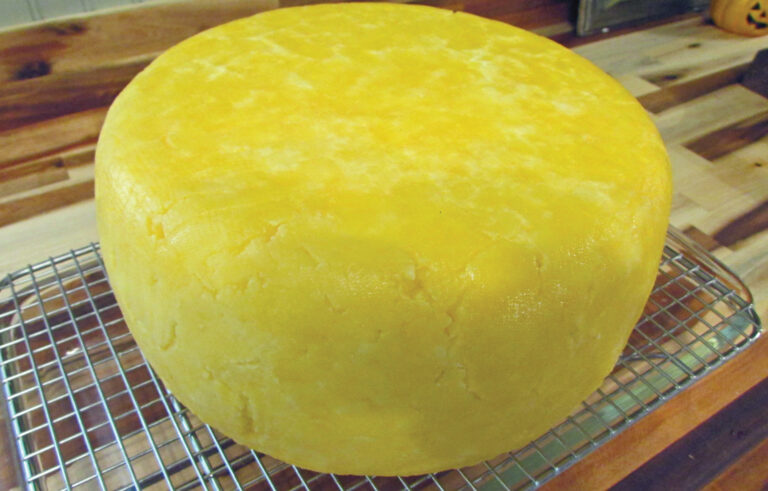
Derby is a semihard cheese traditionally made with milk from pastured cows. It’s closely related to colby and cheddar, but its higher moisture content provides a creamier and smoother cheese that melts readily. It’s traditionally made with a natural or waxed rind. Often described as having a “buttery” flavor, Derby derives its natural color from the milk of grass-fed cows.
Traditional Derby Cheese Recipe
To make Derby cheese, gather the equipment and ingredients and set aside 3-1/2 to 4 hours to complete the process. For consistent results, pay close attention to small details in the recipe, including time and temperature. Set a timer to help keep track of the different time requirements.
This recipe can be doubled for use with a larger cheese mold.
Equipment
- Stainless-steel or enamel pot
- Digital kitchen thermometer
- Timer
- Long-handled, slotted, stainless-steel spoon
- Measuring spoons
- Liquid measuring cup
- Long-handled, stainless-steel knife
- Cheesecloth
- Stainless-steel colander
- Cheese mold with follower
- Cheese press (and weights or pressure gauge)
- Cheese mat or drying rack
- Cheese wax
Ingredients
- 2 gallons whole milk
- 1/4 teaspoon mesophilic culture
- 1/2 teaspoon calcium chloride (if using pasteurized milk)
- 1/2 teaspoon liquid rennet (single-strength)
- 1-1/2 teaspoons cheese salt or
- noniodized salt
Preparation
- Sterilize all equipment and countertops. This can be done with a mixture of 2 tablespoons household bleach to 1 gallon water. This method of sterilization is especially important if the pot has stains or odors from previous use. Thoroughly rinse, as bleach can inhibit the growth of the good bacteria needed for making cheese. Use boiling water for the final rinse, then air-dry all equipment.
- Don’t make anything with yeast on the same day as you’re making cheese. Yeast in the air can contaminate the cheese.
Bringing the Milk to Temperature
Warm the milk to 84 degrees Fahrenheit. A heavy-walled stainless-steel pot can be put directly on the stove if the temperature is monitored carefully. When the correct temperature has been achieved, remove the pot from the heat source.

If the cheese vat you choose is made of thinner material, such as an enamel canner, create a double-boiler system by setting a smaller pot inside a larger pot of water. You can also place the enamel pot in a sink and surround the pot with hot water to raise the temperature of the milk.
Ripening the Milk
Once the milk has reached the desired temperature, sprinkle 1/4 teaspoon powdered mesophilic culture on the surface of the warmed milk. Allow it to set undisturbed for about 5 minutes to rehydrate. Then, using a long-handled, slotted, stainless-steel spoon, create a gentle up-and-down motion for 30 to 60 seconds to draw the mesophilic culture down into the milk. Cover the pot and let the milk ripen for 45 minutes.
If you’re using pasteurized milk, after the milk has ripened, dilute 1/2 teaspoon calcium chloride in 1/4 cup cool, unchlorinated water. Add it to the milk with the same gentle up-and-down motion described above.
Coagulation
Check the temperature of the milk and warm it back up to 84 degrees if necessary.
In a liquid measuring cup, add 1/2 teaspoon liquid rennet to 1/4 cup cool water, mix thoroughly, and then pour into the warm, ripened milk. Mix rennet into the milk for 30 to 60 seconds using a gentle up-and-down motion. Cover the pot once again and let the milk set undisturbed for 1 hour.
Then, check if the milk has coagulated by inserting the tip of a knife blade into the milk and then gently pulling up. If the milk separates with a clean break where the curds lift, the curds are ready to cut. If the curds haven’t coagulated properly, give them 5 to 10 more minutes to set.
Cutting the Curds
Cut the curds into 1/2-inch pieces, first by slicing in one direction and then the other. Use your spoon to gently lift the pieces and slice through the larger curds to make them as close to 1/2 inch as possible. Don’t worry if the pieces aren’t cut into perfect squares or aren’t exactly 1/2 inch. Let the curds rest for 5 minutes to firm up before proceeding.
Cooking the Curds
Slowly heat the curds to 94 degrees over 30 minutes. Stir gently from time to time to keep the curds from lying directly on the bottom of the pot, where they’ll get too much heat and clump together. Do not allow the heat to rise above 94 degrees.

When the curds have reached 94 degrees, maintain that temperature, and stir constantly for an additional 10 minutes.
Draining and Salting the Curds
Drain the curds through a cheesecloth-lined colander, but don’t discard the whey. Return the whey to the pot and suspend the drained curds, still in the colander, over the whey. This will keep the curds warm for the next hour.
Keep the whey around 94 degrees. Cover the curds in the colander to keep in the heat. I place a small lid or plate directly on the curds, not only to retain heat but also as a slight weight. The light pressure helps the curds form a solid mass*, making it easier to flip the curds. Flip the curds every 15 minutes for a total of 1 hour. Afterward, cut or tear the curds into pieces that are no larger than 1 inch in size.

Place the cut curds into a bowl and sprinkle 1-1/2 teaspoons of noniodized salt on the curds. Toss the curds to uniformly distribute the salt.
*If your curds don’t begin to stick together, forming a semi-solid mass, they’re probably not being kept warm enough. Slightly raise the temperature of the whey, and keep the curds covered.
Pressing the Cheese
Line the cheese mold with cheesecloth, and then place the salted curds into the lined mold. Fold the cheesecloth smoothly over the curds and place the follower on top. Press cheese for 10 minutes at 15 pounds of pressure.
Take the cheese from the mold and remove the cheesecloth. Flip the cheese over, wrapping it again in the cheesecloth, and return it to the mold with the follower. Press at 30 pounds of pressure for 2 hours.
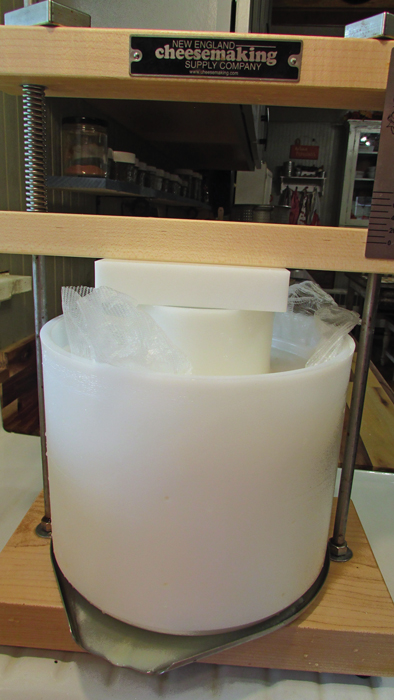
After 2 hours, remove the cheese from the mold and cheesecloth and turn it over again. Rewrap the cheese in the cheesecloth, return the cheese to the mold, and replace the follower. Apply 50 pounds of pressure for 24 hours.
Drying and Waxing the Cheese
Remove the cheese from the mold, unwrap it, and place it on a mat or drying rack. Turn the cheese over every 12 hours.
When the cheese is dry to the touch and has developed a nice rind, which may take 2 to 5 days, coat it with 2 to 3 layers of wax and place it in a cheese cave.
Aging the Cheese
Derby cheese is best when aged 60 to 90 days, but it can be aged for as little as 1 month and for as long as 9 months. Derby that’s aged for 9 months will develop a taste and texture like that of a mild cheddar.
Maintain the temperature of the cheese cave at 50 to 55 degrees, and turn the cheese several times a week so it develops a consistent flavor throughout.
Derby cheese is a great place to start making aged cheese. Its smooth and creamy texture makes it a wonderful addition to many dishes and sandwiches. And you can’t go wrong adding it to cheese platters or simply slicing off a piece for a nutritious snack. Derby is a versatile cheese that’s fun to make and delicious to eat.
Sage Derby Cheese Recipes
A variation of Derby can be made by mixing fresh sage with the curds, which produces a marbled green-looking cheese. Sage Derby cheese pairs well with fruits and fruit wine, and was originally served in Derbyshire, England, at Christmas and sometimes to celebrate the end of the harvest season. Sage Derby was originally produced for the health benefits associated with sage.
Directions Pour 2 cups boiling water over 1 cup fresh sage leaves, chopped, and allow them to steep until cool (approximately half an hour). Cut prepared curds into 1-inch squares. Pour the entire mixture of sage and water over the curds that have been placed in a bowl, and mix well. Soak the curds in this mixture for 15 minutes and then drain the curds thoroughly in a colander. The bits of sage will remain. Proceed according to the recipe above, starting with the addition of salt to the curds.
Port Derby Cheese
Port wine gives Derby a lovely marbled effect, and the cheese tastes both sweet and salty. It pairs well with fruit and nuts.
Directions Place 1-inch pieces of Derby curd into a bowl. Pour enough port wine over the curds to cover them. Soak for 1 hour. Afterward, drain the wine from the curds and proceed with the recipe on Pages 53 and 54, starting with the addition of salt to the curds.
Tammy Cupp and her husband, Mike, raise and train dairy cattle on 50 acres in the Blue Ridge Mountains. Follow them on Instagram and Facebook (@Maplelawn_Farm).