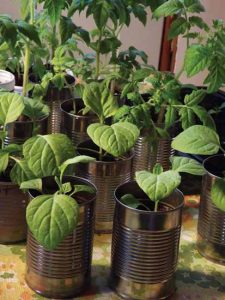
This has been my first week on Baylor shift and it has been fabulous. Although this week has been busy, it has been so nice to have consecutive days away from the chaos of the ER. This week my husband and I started P-90x. Not only are we getting our crops in shape for the spring, but we are getting ourselves in shape as well. I also made dinner for my parents and in-laws which turned out really nice. Our menu consisted of Prime Rib, honey carrots, roasted potatoes, croissants, mushroom rice and banana pudding and a chocolate caramel tart for dessert. Although I wasn’t able to use any of my own crops yet, I look forward to the day when getting groceries simply means stepping out into the yard and harvesting what I need.
My husband and I also visited my grandparents this week, it is always such a blessing to speak with them and eat some of my grandma’s delicious homemade food. She also passed along a few family recipes. One family recipe was for cheese souffle, which is from my Grandma Alice, who was my Farmer Grandfather’s wife. I also brought along some treats for them including homemade butter, fresh eggs and some leftover slices of the chocolate caramel tart. For those of you that have never made butter, it is very simple and the taste is super creamy. One really neat thing about making your own butter is you can add additional flavors, like garlic or herbs, which would taste delicious on homemade bread. Here are a few general instructions on making butter…
Make sure that you are using heavy cream, whipping cream will not work and you will just end up with very whipped, whipped cream. I typically set the cartons of heavy cream on the counter to help warm them up a tad. This makes the process faster. There are several options for the actual act of “churning” the butter. You can choose to do it in a mason jar, but this involves lots of shaking and upper body strength. The few times I have done it this way, I put on the song by Outkast “Hey Ya,” for inspiration, and shake the mason jar in up and down motions while the song plays several times. Although this is very entertaining to watch, it is pretty tiring by the end of all that shaking!
I now make it in a food processor which is faster and easier. After the cream has set out for 15-20 minutes, I pour it in the food processor, replace the top and push the button. Hard work, I know. After around 10-15 minutes, you will notice the consistency has begun to change. Take a look here,
The point of all this churning is to separate the actual butter (or what will be butter) from the whey in the cream. The longer you churn, the thicker your butter becomes. I tend to churn for a few minutes and then scrape down the sides and poke at the clump with a spatula. This helps squish out the whey as well. I then do several cycles of the churning and scraping until the butter is formed and thick.
I then carefully pour out the whey from the container. I do not save this whey, but I know many people do to reuse it in other elements of cooking. After getting as much whey out this way as I can (squishing it with a spatula and pouring again helps) I take out a blob of butter and flatten it in my hands or on a plate. The purpose of all this activity is to get as much whey out as possible. I have found that the wetter the butter, the faster it will spoil.

I also have plastic molds I use to put the butter into and let them drain for 20 minutes or so over a pan to catch the whey. After you are satisfied that all the whey has been removed as possible, you can salt the butter if desired (just a pinch). Make sure you spread the salt around evenly (or mix the butter in your hands after salting) so all parts of the butter are evenly salted. You can also make shapes with your butter or just put them in a container for use. Keep homemade butter in the fridge in an air tight container or plastic wrap when not in use. With two little cartons of heavy cream I made a 6×2 inch butter rectangle (which is not pictured) and what is seen below.

Homemade butter has such a rich taste and is not full of all the preservatives and chemicals like store bought butter.
In other news, with consideration of the recent hawk attacks, our girls have only been allowed to free range when we are outside with them. This has led to hen boredom while they are cooped up. While I have made sure there is plenty of food and entertainment available in the coop to try and prevent this, they are none to happy about their new arrangement. Poor Princess has been suffering the brunt of their boredom, and has become a source of even more intense bullying. They have been keeping her from the food and water as well as pecking the mess out of her.
We have decided that it is definitely time to remove Princess from that coop and get her one of her own. She will also be getting a new Silkie buddy to keep her company. If anyone has looked into buying chicken coops, you know how ridiculously some of the coops are priced. I have found coops anywhere from $500-$6,000. Ridiculous, I know! Due to our time constraints, we were unable to build another coop. We found a reasonably priced small coop on ebay and are looking forward to a happier Princess.
Until next time…
Don’t miss any Homestead Redhead Adventures, check out full blog HERE.