Spring is in full swing, and here at the Greenbank Farm Training Center we have been swinging ourselves between the greenhouse and the fields. The time to plant is now, and it has been a constant dance between planting seeds in the greenhouse, direct seeding in the field, and transplanting. If anyone is curious, I thought I would share our method or organization here at the farm.
Crop Plan
This is where we use our Excel spreadsheets. First, we figured out how much food we need to grow to support our 50-member CSA, farmers market, and wholesale accounts. Then we figured out how much space we needed to grow that much food, along with how much time each crop needs to reach full maturity. This process took a lot of math – from counting back days to maturity to days of desired harvest to figuring how many chard plants make a bunch. We also calculated how often we need to plant our staple crops that we intend to harvest bi-weekly, like radishes and lettuces, and how long those crops can stay fresh in the field. After doing the hard work, we determined what plants would be planted where on our five-acre field, laminated the crop plan, and headed to the fields.
Plug Trays and Soil Blocks
We have been planting many of our starts in 72- and 98-cell plug trays. Crops such as kale, chard, lettuces, Asian greens, and many of our flowers and herbs do well starting in plug trays. There are several advantages to using this method, including uniformity of the seedlings size, time efficiency, and basic ease in the transportation of starts. Plug trays are also very easy to use. Drawbacks to the plug trays mainly consist of the fact they are made out of plastic, which is always a bit tough on the environmentally-minded conscience. Also, plants have the potential to become root bound, where roots begin to circle around the plug tray when they no longer have space to grow downward.
We started our tomatoes, eggplants, and peppers in soil blocks. Announcement: Soil blocks are incredibly fun! If you liked making sandcastles as a child (or as an adult) than you will love making soil blocks. Soil blocks come in a variety of sizes. We have started all of our tomatoes and pepper using the smallest blocks (three-quarter-inch cubes),and now we are in the process of transplanting the three-quarter-inch cubes into two-inch cubes. (It’s like a puzzle!) Advantages to using soil blocks include the benefit to the environment (no plastic), less of a chance for plants to become root bound, and lastly, hours of fun. Disadvantages are that they use more potting soil and take more time. (As my husband Alan, a fellow Greenbank Farming Training Center participant, proof-read this blog entry, he asked me to emphasize that soil blocks take a lot of time.)
A Recipe for Potting Soil
With all of the soil blocks we have been making and the plug trays we have been filling, we also need to be making potting soil. Here’s our recipe:
4 parts peat moss
2 parts vermiculite
2 parts perlite
1 part soil (sifted)
optional 1-2 parts compost (sifted)
2-4 cups fertilizer mix (equal parts bone meal, fish meal, green sand, kelp meal)
* A note of interest: on the first several trays of chard that we planted, we noticed we were having issues with damping off. The roots to our baby chard were brown and dying – a definite cause for concern. Our crew came to the conclusion that our compost was still too “hot” and causing our root damage. After removing the compost from our potting soil, we were problem free.
Hardening Off in our Makeshift Cold Frame
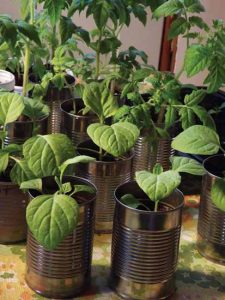
Our greenhouse is only so big, and we have a lot of food and flowers to grow. On a limited budget, we built two cold frames to shelter our plants as we harden them off – transition them between the greenhouse and their future home in the field. Sebastian, the farm school coordinator, compared these plants to teenagers. “We don’t want to kick them out of the house quite yet, but we don’t want them hanging on to us for too much longer.” We keep them under row cover and resting on reused wood pallets.
Transplant Time
This is the fun part. We’ve coddled and canoodled our babies past the cotyledon stage. Their true leaves have appeared, and if we leave them any longer in the plug trays, their roots are going to start growing upwards or round and round. We gently release the plugs from their trays and carefully plant each plant with its proper spacing. We created spacing poles – long pieces of wood and old pipe that we marked in one-foot increments. Very easy.
Direct Seeding
Several of our crops we have seeded directly into the earth. This includes our weekly planting of SARTAC, which stands for Salad greens, Arugula, Radish, Turnip, Asian greens, and Cilantro. This method is both time-efficient and easy, especially with the use of our seeder.
Weeding, Watering, and Waiting
After planting and transplanting, we let the plants do what they are meant to do: grow. We weed between the rows, and do our best to make sure the plants have the best environment to thrive. If the plants need water, we have rigged up an irrigation system using a nearby duck pond. Some crops we have tucked in with row cover to protect them from the birds and the wind. Others, we let be. We will have to deal with complications as they arise, but, luckily, there haven’t been many issues so far.