Make the most of nature’s gift on your homestead by harnessing and moving rainwater with off-grid water system inventive builds.
Since moving to our property, our main source of all drinking, washing, animal, garden, and orchard water has been rainfall. We have no well, not because we wouldn’t like one, but rather because rainwater makes good economic sense in our dry region. Once the infrastructure of roofline, piping, and tanks are bought and paid for, it’s as simple as waiting — and often praying — for rain.
Catching, Calculating, and Filtering Rainwater
Water infrastructure is critically important. For that reason, we decided to hire out the work of putting up a roofline, a catchwater tank, and gutters before we even moved to our land. We drove south from Michigan to Texas during one of the driest summers in history, but just a few days before we arrived, 5 inches rained down on the parched earth, and our tank was filled and ready for us when we arrived.

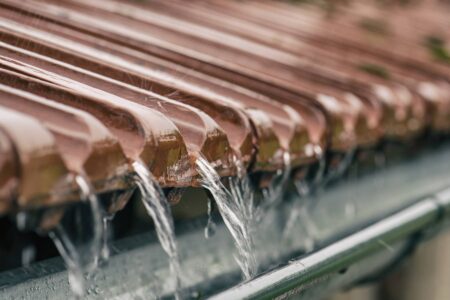
To catch rainwater, you need three things in place: a roofline, a gutter with piping, and a holding tank.
We currently use three black tanks totaling 5,500 gallons of holding capacity. Those tanks, along with our ponds, provide all the water we use for animals, fruit trees, gardens, and ourselves. It’s a good start at catching what we might need to carry us through the frequent dry months between rains.
In our experience in a drier climate, you can’t have too much water, whether it’s stored in tanks or utilized on the land properly. We tend to get rainfall in fits and spurts, so it’s imperative that when it comes, we’re ready and able to catch and store it.

It’s not uncommon, in our area, to see a roofline that seems to have no other purpose than to catch water. But if you have a home, garage, barn, or other structure in place, you can set up gutters and a tank, and start catching rainwater right away for both outdoor and indoor use.
To calculate how much rainwater you could potentially catch for your roof size, there’s a simple equation that goes something like this: Roof square footage x (inches of rain x 0.5) = gallons of collected rainfall.

You can also use this equation for what-if scenarios, such as how much roof area you’d need to fill a tank with a typical rainfall in your area. This type of planning is essential in the process of developing your rainwater infrastructure.
Here are two DIY projects we use to capture and move rainwater around our off-grid homestead.

Gravity-Fed Household Water Setup
If you’re wondering how efficiently this simple setup runs, when our 1,500-gallon tank is half-full, we have 2 gallons per minute at our laundry sink, and around 1-3/4 gallons per minute at the kitchen sink through our garden hose outlet.
If you’re planning to build a home that will input gravity-fed water, be sure to plan ahead so that the bottom of the storage tank is above your water input level (that is, your sink or bathtub).
Tools & Materials
- Dirt
- Level
- 12 to 14 grade stakes
- 1/4-inch-thick plywood, as needed
- 1/2-inch screws
- Drill
- 3/8-inch rebar
- 20 to 25 80-pound bags ready-mix concrete
- 1,500- to 3,000-gallon water tank
- Solar water pump, optional
Directions
- Create a platform for your tank. Our “water tower” is simply a hill of dirt we piled up with a backhoe. Be sure to build the tower at a slightly higher elevation than where your water output is going (a sink or bathtub). When deciding how high to elevate your tank, remember that the tank also has to be below the level of your roofline if you’re directly catching rainwater into it. Also consider your water-pressure requirements. You can have fairly low water pressure that still fills things fairly quickly by using larger-volume pipe. If you can live with this, you can reduce your water tower height considerably.
- Level out the dirt pile and prepare a form by staking out a circle that’s at least 6 to 12 inches wider in diameter than your tank. Pound in stakes around the outside of the circle. Cut the plywood into strips 6 inches tall. Shape these inside the stakes to create the outer edge of the circle. Screw the plywood into the stakes in a manner that aligns the tops of the plywood strips with each other. Add rebar as desired for extra strength.
- Next, mix the concrete according to the manufacturer’s instructions, and pour a smooth, level slab inside the form. Let the concrete dry and cure completely before moving the empty water tank to the platform. You can place a small roofline over this tank to protect the hill from erosion and the tank from sun exposure.
- For a pump-assisted gravity-fed water system, install a solar-powered water pump. Use this to pump water from other catchment tanks up to the elevated tank when the upper tank runs dry.
- Pipe the water into the house. Keep in mind that standard faucets have very restricted piping because city water pressure is so high. For that reason, we like to employ laundry-sink faucets and garden hoses. Run 3/4-inch PVC pipe from the water tank to your laundry-sink faucet or garden hose. For water conservation purposes, we also have a regular faucet in the kitchen sink that, due to its low flow rate, works well for hand-washing.

Bicycle Wheel Water Lifter
This easy project offers a simple solution to moving water anywhere on your property without a solar- or wind-powered pump — or even a manual water pump. Get the biggest bicycle wheel you can find and turn it into a pulley. Put the pulley on top of some type of pole or tower setup, then pull a bucket of water up via a rope. But, you say, lifting water vertically does nothing for moving it horizontally, right? Actually, it does if you have a hose connected to the bucket that can divert water to wherever you want it.

Your distance for moving the water is only limited by your tower height. The volume you can move at once is mostly limited to the size of the bucket. For example, if your tower and wheel were strong enough, you could lift a 10-gallon bucket instead of a 5-gallon bucket.
The time required to complete this project is about four hours; this will vary depending on the design of the support. Depending on the materials you have laying around your property, the cost of the project could be minimal. You can get used bicycles at thrift shops, or you may already have an old one you’re not using. The only other expense is building your pole or tower, but this won’t cost much if you have access to scrap wood.

Tools & Materials
- 4-by-4 post
- 2-by-4s, as needed
- Large bicycle wheel
- 1-1/4-inch drill bit or hole saw
- Rebar cutters, hacksaw, or reciprocating saw
- 3/8-inch rebar
- Drill and bit sized to fit the rebar
- 2-1/2- to 3-1/2-inch screws or nails
- 5-gallon bucket
- 3/4-inch Uniseal
- 4-inch piece of 3/4-inch-diameter PVC pipe
- 3/4-inch-diameter PVC garden hose adapter
- PVC primer and glue
- Garden hose
- Rope, cut to a length twice as long as your tower is high
- Shovel and mixing hoe (optional)
- Concrete (optional)

Directions
- Build a post or tower that will hold the bike wheel pulley. To do this, you could set a 4-by-4 in concrete, or be creative and come up with any method that will hold your pulley as high as you want the water to be lifted. In my first design, I used scrap 2-by-4s that I secured to our cabin.
- Remove the rubber tread and tubing from the bicycle rim and cut two 2-by-4s of equal length that are at least 1 foot longer than the radius of the bicycle rim.
- Stack the 2-by-4 boards, and drill holes near the end through both where the rebar will pass through to support the bicycle rim. These holes will support the pulley axle.
- Cut some rebar long enough to go through both 2-by-4s and the bike rim, with enough space for the rim to turn freely. This will probably be at least 8 inches long — maybe a little longer.
- Make the “pulley sandwich” by putting the rebar through the first 2-by-4, through the bicycle rim’s center hole, and then through the second 2-by-4.
- Using screws or nails, attach these 2-by-4s to the top of your 4-by-4 post, one on each side. Use extra material as needed to attach or reinforce this connection if you built a custom tower.
- Drill a 1-1/4-inch hole in the side of the 5-gallon bucket near the bottom, and install the Uniseal in the hole. Insert the 3/4-inch PVC pipe into the Uniseal (use soapy water as needed to help it slip through) and attach the PVC pipe to the garden hose adapter. Use PVC primer and glue to make the connection permanent.
- Attach a garden hose to the PVC pipe via the new adapter. Depending on the type of hose you’re using, you may want to get a 90- or 45-degree garden hose fitting to ease the strain on the garden hose as the bucket is lifted.
- Tie a rope to the bucket and feed the rope up and over the bicycle pulley. Tie off the other end of the rope to the post so the rope won’t slip off or go slack. It’s helpful to place a screw or nail into the post at the right height to tie the rope to.
- Place the end of the garden hose where you want the water to go, fill the bucket with water, and lift away. Hold the bucket up to the desired height until all the water drains out. To make it easier, you could add a simple clip or rope tie-off to the post to hold the bucket up while the water drains.
Reprinted with permission from The Doable Off-Grid Homestead by Stewart and Shannon Stonger, published by Page Street Publishing Co. Stewart and Shannon Stonger are the founders of NourishingDays.


