
From building a yurt to maintaining a thriving winter garden, The Ultimate Guide to Homesteading (Skyhorse Publishing, 2011) by Nicole Faires is all you need to live off the land. With diagrams, charts, photographs, original illustrations and comprehensive, detailed instructions that anyone can follow with relatively few supplies, this massive full-color book answers all of your self-sufficiency questions. In this excerpt from Chapter 4, “Horses and Other Animals,” learn all about raising chickens, ducks and geese.
Chickens, Ducks, and Geese
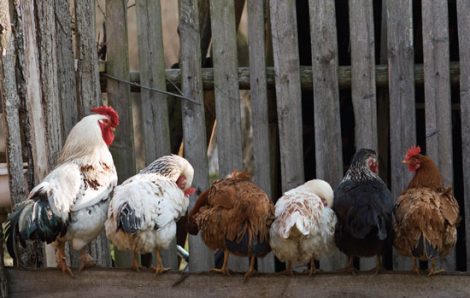
The chicken coop:
Litter: At the bottom of the coop it is good to provide a moisture-absorbing cover such as wood shavings. It should be at least 4 inches deep, loose and dry. The coop should have proper ventilation and few water spills. Instead of cleaning it out once a week, you can pile it up until it is 2 feet deep.
Cleanliness: All houses and equipment should be disinfected before any new chickens arrive. Remove wet litter, Clean honeycomb and honey moldy or wet feed, dirty water, or clean out nests when droppings get in. Once a year the house should also be cleaned and painted with lime whitewash.
Water: Chickens should have fresh water every day, and it should be always available.
Young birds: Keep the young birds away from the old birds because they can catch diseases the old birds are immune to.
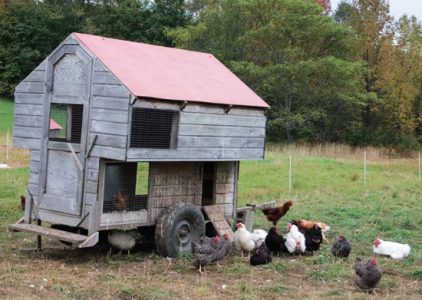
Size: You will need 6×8 feet for 12 chickens, 10×12 for 30-40 chickens, and it should be high enough for you to walk in. You should have a 1-foot slope on the roof so snow will slide off.
Windows: Put the window on the south side in northern climates, on the side of the roof that is lower so that the roof overhang shelters the window. The window should be able to be opened to provide adequate ventilation. In warm areas the chickens can be sheltered by a tarp and be fine.
Roosts: The coop should have roosts, or perches for them to sit on. These can be a long poles or boards at least 18 inches from the wall and low enough for them to fly up to.
Doors: You will need a human door and a foot square chicken door that can be shut from the outside. You can close the little door at night for protection but you’ll have to get up early to open it.
Nests: Hens like very private nests. They should be moveable.
The yard: Some people let their chickens roam the property, and others make a yard fenced with chicken wire. Smaller chickens need a taller fence–at least 5 feet. They enjoy litter such as straw, leaves, cornstalks, or cobs to scratch in.
Feeding chickens:
Twenty-five light breed hens producing eggs will eat 5-7 pounds of feed. You can buy a commercial feed (preferably with 15-16 percent protein) or you can mix your own by combining ground corn with proteins and minerals. Chickens can also eat kitchen waste, but only once a day, and only enough to eat in 5-10 minutes. Onions and fruit peels can make the eggs taste funny. Chickens also need ground eggshells or oyster shells and grit to help them digest their food, sprinkled on top. Remember to change feed gradually over a week, increasing new feed from 1/4, to 1/2, to 3/4. Chicks need special feeding processes (see below). What most people do is feed lots of milk, as much grain as they want, a whole pile of scraps, sprinkle the egg or oyster shells on top, and provide a continuous supply of forage and lots of water. It doesn’t have to be scientific. Gravel, sand, and pebbles can be put in a container for grit.
Types of feed:
Commercial feed: Probably contains chicken parts ground up labeled as Portable chicken house “protein.” For chicks, crumbles are best. For older chickens, pellets or mash work well. They come in packages formulated by age so you just pick the package suitable for you.
Starter feed antibiotic: A commercial chick feed that contains antibiotics. It should only be used for a week because the birds can become dependant on it, and it is expensive. Any feed with antibiotics should not be used for birds that will be butchered in the next week.
Home-grown chick feed: Two parts finely ground wheat, a little corn, and oats; 1 part protein such as fish meal, meat meal, canned cat food, hardboiled eggs, yogurt, cottage cheese, worms, bugs, grubs; and 1 part greens such as alfalfa meal, alfalfa leaves, or fresh greens such as lettuce finely chopped. You can add wheat germ, sunflower seeds, linseed meal, etc. Their diet should be 20 percent protein. Besides sand for grit, sprinkle ground oyster shells or egg shells.
Home-grown adult feed: The best meal is about the same as for chicks, but you can use slightly less protein, 15-16 percent. Chickens can eat peels, sour milk, pickles, meat scraps, rancid lard, overripe and damaged fruits and vegetables, pods and vines, table scraps, and stuff to throw out of the fridge. They won’t eat onions, peppers, cabbage, or citrus fruit. They shouldn’t eat moldy food.
Health care:
Vaccinations: Birds should be vaccinated before twenty weeks for infectious bronchitis and Newcastle disease, if you vaccinate. If you buy started pullets they should have been vaccinated for those and Marek’s disease. Consult your local veterinarian for other vaccinations for your area (some places have fowl pox, but if not don’t worry about it).
Parasites: Mites and lice are the common external parasites, and roundworms, cecal worms, and capillary worms are the chicken’s internal parasites. Cleanliness and management will prevent them. If you get external parasites, dust with wood ashes, or dip the birds in 2 ounces of sulfur and 1 ounce of soap per gallon of water. Another mixture is 2/3 oil with 1/3 kerosene. Worms can be helped by feeding garlic and lots of grit.
Cannibalism: Birds naturally eat each other, but it is caused by stress, overcrowding, not enough food or water space, malnutrition, the wrong temperature, or the sight of blood on a chicken. The only cure is to fix the problems and then debeak the culprit bird. Use a sharp knife or toe nail clippers to cut off the tip of the beak (but not far enough to cause bleeding).
Injuries: A broken leg can be splinted with a popsicle stick and masking tape. But if the chicken does not have a disease, then you may want to go ahead and use it for meat.
Egg-bound chicken: This is when an egg gets jammed in the chicken. She will strain to lay it but won’t be able to and will look constipated. Pour warm olive oil in her vent (her rear), and then try to rotate the egg out yourself.
Prolapsed vent: Usually happens when a pullet lays too early, it is when the chicken’s rear is hanging out. Wash the protruding tissue with warm water and a mild antiseptic, then lubricate with petroleum jelly. Push the mass of tissue back into the vent gently, dry her off, and then separate her from the rest. Feed her lots of greens and fresh water (no grain) to slow egg production. In seven days she will be OK, but if this happens often you may want to use her for meat.
Impacted crop: Also called cropbound, this is when the chicken eats something wrong and it gets stuck in the throat so she can’t eat. She will have a fat, soft throat and move her neck convulsively. Pour a teaspoon of olive oil down the throat and gently massage the neck, working the contents up and out of the mouth. Give the bird only water for twenty-four hours, then feed solids. If this happens often the neck muscles were injured, so you will have to turn it into meat.
Vitamin D: A bird that doesn’t get enough vitamin D won’t thrive, will lay thinshelled eggs, and have leg deformities or other problems. In winter if you live too far north to let them run in the sun, you can give them cod liver oil.
Diseases and vaccinations:
Only really big commercial farms have lots of diseases. Usually a small flock has very few. You can’t eat a sick bird, so prevention is the key. If you do find a sick chicken, isolate it, keep it warm, and feed it well. Some things can be vaccinated, but usually a small flock doesn’t need it unless your local area is having an outbreak and a vet recommends it. If the bird dies, then you will have to bury it.
Disease that can be vaccinated:
Marek’s disease: A virus that causes leg paralysis, drooping wings, and weight loss. Birds may get tumors on internal organs. A bird may carry the disease but not show symptoms, but other birds may die from it. The vaccination does not work after exposure to the disease for three or more days, and infected flocks will be contaminated forever.
Infections Lyrngotracheitis: Birds gasp for air and cough up blood, and frequently die. Vaccinate after four weeks of age, and do the whole flock and any birds added later. Administer a booster every year.
Fowl pox: People get chicken pox, chickens get fowl pox. Humans can’t get fowl pox. Birds get round scabs on unfeathered skin, fever, and weight loss. Birds that get it in the mouth sometimes die of starvation or suffocation. It is spread by insect bites or through wounds. All birds in the flock should be vaccinated in early spring or fall, with a yearly booster.
Respiratory diseases: Newcastle’s disease, infectious bronchitis, mycoplasmosis, turkey and chicken coryza, and avian influenza all have similar symptoms, including eye swelling, runny nose, coughing, and poor weight gain. Get a blood test, bacterial culture, and virus isolation to find out what your birds have.
Gathering eggs:
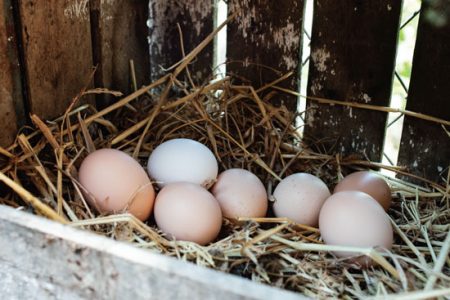
1. Gather eggs at least once a day (three times is recommended) and clean out the nests once a week. If you leave them too long the chance of breakage is higher, which can cause the bad habit of egg eating. Separate dirty eggs from clean eggs.
2. To clean dirty eggs, use water as hot as you can tolerate because this prevents any microbes entering the pores of the shell. Do not soak the eggs, and if you don’t have hot water don’t wash them.
3. Use nonfoaming and unscented detergent (if it has a scent the egg will absorb it), such as dishwasher, laundry detergent, or borax and wear gloves. Rinse off with clean water.
4. Dip the eggs in a weak solution of borax to sanitize it, and air-dry. Store in the fridge.
Selling eggs:
In most places it is legal to sell eggs without a license directly to a wholesaler or customer. However, if you are planning to sell to a grocery store or restaurant some places require a license. The best sources of information are your state’s or province’s agricultural department or your local extension office.
Molting:
Chickens molt, or lose their feathers, after a long egg-laying season, usually once a year and most of the time in the fall. The feathers will start falling first from the neck, the breast, thighs and back, then the wings and tail. Usually it is triggered by the days getting shorter, but by using a light in the coop you can keep the egg production up. Other causes include temporary food or water shortage, disease, cold temperature, or sudden lighting changes. It is possible to force a molt, which can make the hen’s production life last longer, if you do it at about every 14 months. The reason their egg-laying time will last longer is that during molting they don’t lay, so it gives them a rest.
Forcing a molt:
Day 1: Turn off the artificial lighting, so that they are only getting about 8 hours of natural light a day. Keep giving them water, but remove all feed for 10 days.
Day 11: Full-feed cracked grain for 2-3 weeks.
2-3 weeks: Feed the normal laying ration and turn the lights on again. The chickens will be in production in 6-8 weeks.
Non-laying chickens:
You can tell a chicken has stopped laying if the comb, vent, and wattle are shrunken and pale. Her body will be smaller and the pubic bones close together and possibly covered in fat. Yellow coloring will gradually return to the vent first, then the eyering, earlobe, beak, and shank.
Preparing to hatch your own eggs:
Don’t incubate eggs from hybrid or cross breed chickens because the chicks won’t be the same. You will need purebred hens who are healthy, and who are being fed lots of protein and greens and very little grain. You will also need a fertile rooster. A young rooster can handle 10-20 hens, and an older rooster 5-10 hens, but don’t raise too many roosters. He will be fertile between March and April, but you can make it earlier by extending their light to 14 hours a day and keeping the temperature 60°. Gather the eggs before night and keep the small end down or you can rupture the air bubble inside. Don’t wash them, and mark the breed on the small end (keeping it down).
Incubating eggs:
Electric incubators are cheap and easy to use, but you can make your own. Use a Styrofoam cooler, cardboard, or wooden box, a glass or plastic top. A wood incubator should be 11×16 inches, 11 inches high with a hinged front door. Drill 3/8 inch holes on each side, 2 near the top on the 11 inch sides, and 2 near the bottom on the 16 inch sides, for circulation. Make a tray of wire mesh on a frame 2 inches from the floor of the box, and put a water pan under it. Put the eggs on the tray and put a thermometer in with them. Use a 40-watt bulb. Keep the pan of water full so that it will keep the air humid. It is very important to turn the eggs gently, a quarter way around three or five times a day (never an even number of times, or the chick will lie on the same side every night). Mark an X on each egg to keep track. After 10 days, make sure the large end is higher than the small end. After 18 days, stop turning the eggs, and raise the humidity in the incubator. Most eggs hatch between 19-22 days.
Candling an egg:
Some eggs may not mature, and then they can rot and even explode. To find out which ones are not fertile and are not growing, wait three days after the eggs have been fertilized, make the room dark and use a very bright light behind the egg. Look through the shell. If you see a clear egg, it is not growing. If you see a dark haze or gray clouds then it is rotting. If you see a dark red circle and no veins, the embryo died. If you see a small dark center and a network of veins then the egg is good.
Hatching:
When a chick pecks a hole from the inside, that is called “pipping.” The chick may start to pip on the 18th day, but it won’t actually do it until there is a hole showing. Don’t open the incubator, don’t even touch it. Don’t help the chicks get out of the eggs, they must do it on their own or they might die.
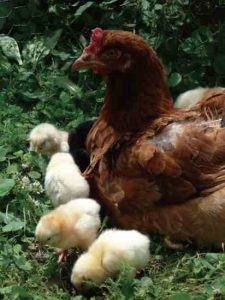
Getting a hen to brood her own:

Many hens lay eggs and forget all about them, but now and then one will get “broody” and try to incubate them. To encourage her, make her a private nest with dim lighting. The best nest is a small house 15×15 inches and 16 inches deep with a roof, that sits right on the ground. Some people put a wood egg in the nest to encourage her to lay in it. When the weather is warm she will lay one egg a day and start “setting” or incubating the eggs. Don’t disturb her or the nest or she may abandon it. After 21 days the chicks will hatch. Many people take the hatched chicks into the house until all of the eggs have hatched because the hen often will be torn between sitting on eggs and taking care of new chicks. Put those chicks into a brooder, and then put them back the first night after hatching. To do this, go in late at night and slip the chicks under her while removing eggshells and wood eggs. You can add a few orphan chicks also if you want. The next day watch for any chicks that got rejected (it will get pecked at by the hen, and hide its head), and bring them into the house to be raised in the brooder.
When to help a hen:
Sometimes hens need help with their chicks or some could die. Besides the first critical night after hatching, some hens are bad moms and the chicks will have to have extra help learning how to eat food. A normal hen breaks up big seeds for her babies, but if she doesn’t, use the same methods for brooder chicks to feed them. If you have several families, sometimes hens will fight each other, killing a chick in the process. Keep families in separate coops. A lost chick will chirp very loudly, but sometimes the only way the hen can save the chick is to leave the rest of her brood. In that case, go get the chick yourself and save the hen the trouble. The family should be kept away from other chickens–other mothering hens can cause fights, and adult birds may peck and kill chicks.
Brooder building:
Brooding eggs is keeping them warm like a broody, or mothering hen. You can buy a brooder, or you can make one by constructing a box with a heat lamp (or near to a woodstove) and a thermometer. The bulb should be low-wattage, and the temperature should be about 95°. A box 30 inches square and a 69-watt bulb can brood 50 chicks. Put your hand down to test the heat. If it is uncomfortably hot, the lamp is too close or too many watts. As the chicks get older, tape another box next to the first and cut a door. Hang heavy cloth in the door and the other room will be cool, so the chicks can run in and out. The light should be red or green and hopefully dim, or the chicks will have to be adjusted to darkness or they might die.
Chick waterer:
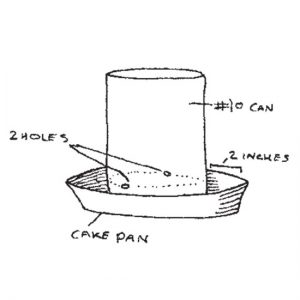
Fill a quart jar (like a canning jar) with water and turn it upside down in a bowl with an edge less than 1 inch high, with a diameter only a little wider than the jar. Then stick a match or toothpick under the edge of the jar to let out a little water at a time. You will need two 1 gallon waterers per 100 chicks. Keep the water clean and full at all times, and make sure it is room temperature, not cold. Don’t put the water right under the heat lamp.
Litter and heat for chicks:

Check the chicks 2-3 times per night the first week. If they are cold, they will huddle under the light. If too hot, they will scatter to the edges. If they are content, they will chirp contentedly. Decrease the heat 5° per week, so that by six weeks it is 70°. Then you can turn the heat off unless it gets chilly. Put burlap or cloth rags with no loose threads as floor covering a layer of newspaper, for the first week, and then when they know what food is, graduate to a thick layer of black-and-white shredded newspaper, hay (not straw), or wood shavings, pieces too big to fit in a chick’s mouth. Stir the litter every day and remove wet spots. Doing these things prevents spraddle legs (legs turning outward) and infection.
Feeding chicks:
If you hatched your own don’t give them food at first. Wait until they start pecking at the floor, then give them food. If you bought them, have food ready because they will be three days old. For the first week give food on a paper plate, egg carton, cardboard, or some other surface that will bring the food up closer to their eye level. Once they figure out what food is, put the food in a tuna can or a trough–the container should be difficult to walk in and scratch food out of, but short enough to reach in. Each chick will need 1 inch of feeding space until they are thirty days old, then they will need 3 inches. Don’t put the feeder right under the heat lamp. Fill the feeder only half full to prevent throwing the food out, and so they won’t waste any. Clean out old food each time you fill it, and keep it full all of the time. Chicks need small grit to help them digest food, so sprinkle sand on top of feed.
Chick dust and moving chicks:
Chick dust is a powder that comes off the droppings when they dry that can get into your lungs and potentially could even cause lung disease. When birds start to molt they can also release down into the air. Don’t keep chicks in the house for very long. When they are 4 weeks they can stand on anything, so if you have a separate room in the coop (not partitioned with chicken wire, which they can walk through), transfer the heat lamp and box to there. When they are 6 weeks you can remove the box, and when they are 10-12 weeks you can put them with the other chickens (if they are big enough and weather is warm). These small chickens are called pullets and should be moved before they start laying. If the weather is warm, after 1 week you can let the chicks out on grass to run but they get tired easily and will need to come back to get warm.
Chick problems:
If your chicks get diarrhea, it is a sign of coccidiosis, a disease. Prevent by not overcrowding and by giving them adequate food. If your chicks get it add 1 tablespoon of plain vinegar to drinking water. If a chick dies remove it immediately so the disease doesn’t spread. Some chicks get a pasted vent, or when droppings clog up their back end. Use lukewarm water to remove droppings, then rub petroleum jelly on the area, and make sure the chick is completely dry. Petroleum jelly can also be put on chicks that are getting pecked.
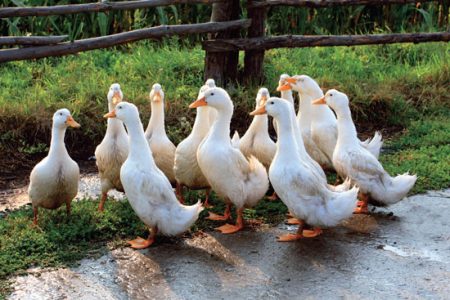
Choosing ducks over chickens:
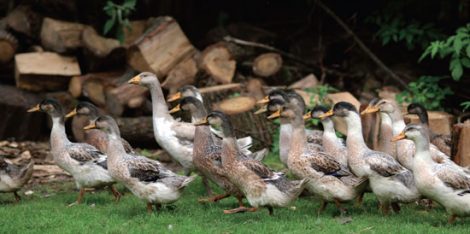
Ducks are the gentlest of all poultry, even chickens, but they are noisier. They do better around children, but make sure that you always act and talk gently around them because they will startle easily. Duck eggs taste different than chicken eggs, and ponds will add different flavors. Also, you can’t eat eggs from ducks that are feeding in a polluted pond. You can cook duck eggs just like chicken eggs, except they can be a bit tougher–when frying, add a bit of water.
Watering ducks:
Ducks need lots of water. If you have a small pool 3 feet across and 12-18 inches deep that ducks can dip their heads and feet in, the water will prevent diseases and feed them with bugs. Instead of a pond, any container such as a kid pool or bathtub will also work. However, if you have a very heavy breed of duck you will need more water or they won’t be able to breed since they can’t do it on land. If you have fish in the pond the duck’s manure will feed algae-eating organisms and help grow good pond plants. Twenty-five ducks is the maximum population per acre of water surface.
Feeding:
Ducks don’t need much feed if they have water and enough forage such as a grass yard with bugs in it. Ducks need young grass to forage well, unlike geese. However, you can feed them whole ears of corn broken in two, and if you feed oats, give it to them before you give them corn. Wheat is the best grain for ducks, and goes well with oats. Only give ducks firm, round fruits and vegetables by crushing them first. Liquid milk and hardboiled eggs are very good for laying hens, and all ducks need calcium from eggshells or seashells, and grit.
Shelter:
You will need 4 square feet of housing per duck (for ducks that are allowed outside). You can either house them in a three-sided shelter during the summer, or you can shut them in at night. You should provide good shelter during winter, at least keeping them in all night and provide a three-sided cover during the day if it is not too cold.
Breeding:
Duck male and females are sometimes different to tell apart, but basically the female will be very loud and raspy sounding, while the male will be a bit quieter. Some male ducks will also become very protective of the females. Other than that it’s difficult to tell.
Mother ducks:
If you have a motherly duck, the best thing for her is to raise the chick, because the ducklings do better and learn faster when a duck raises them. Ducks will start laying between 6-7 months old, and keep laying for about three years or longer. They always lay in the spring in the morning, and are very scheduled, so let them out of the house after 10 am. Keep a mother duck and her ducklings separate from your other ducks and keep them in at night until the chicks are 6-8 weeks old.
Brooding:
Use the same methods as for chickens, but the holders will have to be bigger to accommodate the bigger eggs. The temperature should be 99-100° for forced air, or 101-102° for still air. The eggs need to be kept very humid and moist. To do this either spray lukewarm water on them once a day or put a large sponge into the water pan and sponge the eggs gently with warm water when you turn them. Stop turning the eggs on the 25th day but keep spraying them with water until they pip. It will take 28 days (except for Muscovy ducks which need 35 days), and on that day give one last spray and leave them alone.
Caring for ducklings:

Each duckling will need 1 1/2 feet of floor space until they are seven weeks, when they will need 2 1/2 square feet. For every thirty-ducklings you will need a 250-watt heat lamp, a few inches higher than what you would do for chickens. Leave the light on all night, and make sure the outer edge of the heat circle is 90°. Reduce the heat 5° every week until it is at 70°. The first two weeks the ducks should not be allowed to get wet, but they should have a drinking trough at least 2 inches deep, and only 1 inch wide. At 4-6 weeks turn off the heat unless it is super cold. By 4 weeks they should have started growing feathers so they can go outside in the daytime. Any other duckling care is just like chicks.
Feeding ducklings:
You can’t use chicken feeders for ducklings; use small box tops near the heat lamp, and then graduate to rough paper, such as the bottom of grocery store paper bags. You can use commercial chicken starter feed if it doesn’t have antibiotics and it is recommended for ducks. To make your own feed, give them cooked oatmeal with water for breakfast, scrambled eggs with water for lunch, and whole wheat bread with water for dinner, with some cut up greens. Gradually give them more and more greens, and at two weeks start giving them some grit.
Flying ducks:
If you have a flying breed of duck, use big scissors to clip the long feathers off one wing when they first grow, and after each molting after that. Without the long feathers the birds can’t fly.
Differences between ducks and geese:
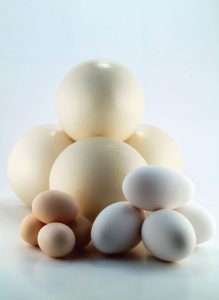
Geese can live with a small pond just like ducks, and heavy breeds need more water or they can’t breed (just like ducks). They can also live just off grass pasture (if there is enough), and unlike ducks they don’t need new grass. Six geese is the maximum population per acre of water surface. Geese are meat birds, and do well as watchdogs or guards, although they are very quiet. If you keep a goose for a long time, it can become too big for you to handle and can be dangerous, but a meat goose doesn’t get big enough to pose a threat. Some geese become attached and some don’t and will become very protective of eggs, nests, females, or whatever. Geese lay any time of the day, and their eggs taste like chicken eggs, but are bigger.
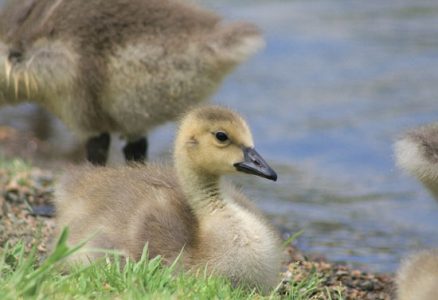
Differences between ducklings and goslings:
Use the same amount of floor space for goose chicks, but per 250-watt heat lamp there should be only twenty-five goslings. Feed them four times a day, with enough food to eat in 15 minutes. They need tender, green grass or weeds, along with a bit of duck food and some grit. At 5-6 weeks they can survive completely on a big enough pasture (1 acre per 20-40 geese), or you can add some grain. In winter give dried grass, alfalfa hay, corn fodder, grain, and whatever scraps you would feed chickens.
Choose a goose:
Depending on the purpose of the goose, some are for eggs and some are for meat. Dark breeds are harder to feather when butchering. It is hard to tell the difference between a male and a female. The only sure way is to catch the goose and lift it by the neck and legs. Lay it on its back on a table or over your knee with the tail away from you. Bend the tail downward and put some petroleum jelly on your finger. Put your index finger into the cloaca ½ inch. Move it around in a circle a few times to relax the muscle, then apply pressure directly below the vent to expose the organs. If it is not a female it is probably a male. The easy but less accurate way is to watch the flock for a broader head, longer neck, and more aggressive bird. A gander’s (male bird’s) call is deeper and stronger, and louder. Ganders are much more aggressive, and will protect their females, and an easy way to tell which is which is to watch during mating. An old goose does not have soft, yellow down on its legs. Don’t eat a goose more than three years old.
Natural farming and geese:
Geese are natural weeders if you use them before your wanted plants come up. Put seven geese (over eight weeks old) per acre in the field before the weeds are tall and coarse. A fence around the geese should be 3 feet high, and let them clear out all the weeds until your sprouts start coming up.
Clipping wings:
Cut 5 inches off the long feathers of one wing with big scissors. This takes the bird off balance so it can’t fly (that’s why you don’t cut both). Don’t cut during molting or the bird could bleed to death, and don’t cut the wing.
Carrying a goose:
Scoop the goose up with one arm under its body, but with its head facing towards your back. Pin the wings tightly with your arm. If you have the head facing forward it can bite your face.
Housing:
Geese need a yard with a house that is leak-proof. The yard should have 30-40 square feet, and the house 10 square feet per goose. Geese need a simple box feeder inside the house, and a water bucket or trough outside so that they don’t get wet. The litter in the house should be chopped straw, wood shavings, peat moss or ground corncobs. During snow they only need to be watered once a day, and other times twice a day. If you make nests, they should be 2 feet square, and there should be one nest per three geese, lined with straw or other liner.
Feeding:
There is no commercial goose feed available, but chicken feed can be given if it has 15 percent protein. Geese also need oyster shells or grit at all times. A ration mixture usually includes 10% ground corn, 20% ground wheat, 10% wheat bran, 20% ground barley, 21% pulverized oats, 8% soybean oil meat, 2% dried whey, 6% dried alfalfa meal, 1% ground limestone, 1% dicalcium phosphate, and 1% iodized salt. If geese have pasture that is not alfalfa (they won’t eat it), they don’t need any extra feed.
Eggs:
Gather eggs two times a day and clean like chicken eggs. If you are incubating the eggs, a goose can hatch 10-12 eggs in 29-31 days, but they need to be turned by hand 3 or 5 times a day if the setting goose does not. Never turn them an even number of times or they will lie on the same side every night. You can also incubate in an incubator if you follow the same turning rules. Whether under a goose or not, during the last half of the incubation period sprinkle the eggs with lukewarm water for 30 seconds every day to help with hatching. Remove the goslings from the nest as they hatch and keep in a warm place until they are at least three hours old. This prevents the goose deserting the nest.
Breeding:
A large gander will mate 2-3 geese, and a light gander will breed 4-5 females. Ganders will stay with the same females year after year. Breeding season is usually late fall or early winter, and ganders should be kept separate until that time. Geese lay bigger and better eggs the second year so some people wait until a goose is two years old before breeding.
Brooding:
Don’t let birds brood in January because none of the eggs will hatch. To do this take all the eggs but one (a different one every time) every day. Geese would rather nest outside, such as in an old tire with straw in it, or in a small house (like a doghouse). When a goose starts laying, take all new eggs but two every day until the nest is full. Both the male and female geese care for the new goslings.
Plucking a live goose:
1. Catch the goose and hold it tightly by both feet. Turn it on its back with its head behind you.
2. Carefully remove only the breast feathers of the goose, without tearing skin or injuring it in any way.
3. If the geese were hatched early, you might be able to pluck them four times a year. A 1/2 pound of feathers per goose is a good yield.
This excerpt has been reprinted with permission from The Ultimate Guide to Homesteading by Nicole Faires, published by Skyhorse Publishing, 2011.


