
Learn the proper method for incubating chicken eggs, including temperature and humidity levels, egg placement, air circulation, and more.
Which came first, the chicken or the egg? For most backyard poultry enthusiasts, the chicken came first – well, more correctly, the day-old chicks first arrived in the mail. But that’s not the only way to create your first flock or maintain your existing one. For folks who are uncertain about receiving live animals through the mail, or simply cannot handle the minimum number of day-old chicks that most hatcheries require, incubating fertile eggs is an attractive alternative. Likewise for folks who keep a rooster in their flock, incubating chicken eggs is a great way to increase the flock size, or to provide replacements for birds that have been culled. Hatching fertile eggs need not be difficult, but your success rate can be increased by following a few guiding principles.
What’s the Correct Incubation Temperature?
Chicken eggs need a fairly specific environment to develop properly and hatch successfully. Perhaps the most important parameter is temperature – chicken eggs should be incubated at a temperature between 99 and 102 degrees Fahrenheit (99.5 is often considered to be ideal) and 50 to 65 percent relative humidity (60 percent is often considered the ideal). To facilitate proper aeration and gas exchange between the embryo inside the egg and the outside world, the eggs must not be held in a tightly sealed container.
Chicken eggs typically hatch after 21 days of incubation. Consider that number to be a target – not an absolute. During the final three days of incubation, the eggs should ideally be located in a slightly cooler (98.5 degrees) and more humid (65 percent relative humidity or greater) environment to facilitate successful hatching. Lowering the temperature helps account for the extra heat that the larger embryos produce as a result of their metabolism, and the increased humidity helps keep the chicks from getting stuck to the membrane that’s located just inside the egg shell as they break out of the shell.
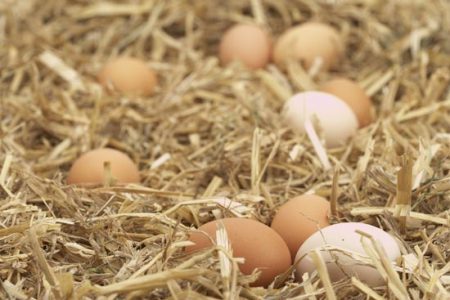
Regular Egg Movement
Just as temperature and humidity are important to maximizing the hatch, eggs need to be moved around on a regular basis for best results. Changing an egg’s attitude helps exercise the embryo and prevent it from sticking to the shell. In general, eggs should be incubated with their pointed ends down (air cell up) – but it is also important to turn or tip the eggs back and forth at least twice a day – the more often they are turned, the better. During the hatching phase, it’s best to lay the eggs on their sides.

Broody Hen Incubation
The easiest way to incubate and hatch fertile chicken eggs is to have a broody hen do all the work for you. What’s a broody hen, you wonder? This hen has undergone progesterone-induced changes that make her want to sit on eggs to hatch them and brood the resulting chicks. A broody hen will take care of ventilating and warming the eggs and will handle all of the turning and chick-rearing duties as well. (Not all hens will go broody.)
If you already have a laying flock and one of your hens becomes broody, she can incubate her own eggs, or you can place fertile eggs obtained elsewhere in her nest, and she will do her best to hatch them. Many folks try to prevent their laying hens from going broody because they don’t lay eggs while hatching and raising chicks – if you want to hatch a few chicks though, a broody hen can be a godsend.
Still-Air or Forced-Air Incubators
When most folks think of incubating chicken eggs, their minds turn to any manner of electromechanical devices that provide the right temperature and humidity. There are two principal categories of incubators suitable for the home flock: still-air and forced-air.
Still-air incubators lack mechanical air circulation. Forced-air incubators use a fan to circulate internal air. Both types of incubators may be equipped with automatic or manual egg turners, and both offer some means for managing relative humidity. Incubator capacity and price vary widely, so it’s wise to consider how many eggs you are likely to hatch in a year before you take the financial plunge. If you choose a small incubator without an egg turner, just remember that it is up to you to turn the eggs at least twice a day.
Experts recommend that you set the temperature of your still-air incubator to 101 to 102 degrees to best avoid the formation of cold spots on the inside. Set forced-air incubators at the desired temperature because the moving air creates a more uniform temperature environment. All incubators should be turned on, adjusted and monitored for at least a day before you set the eggs. Check the temperature with a thermometer that you know to be accurate because a degree or two one way or the other can make or break the hatch. In a still-air incubator, the thermometer should be placed about the height of the top of the eggs.
Serious poultry enthusiasts may have one incubator for incubating and a second (sometimes called a hatcher) for hatching. This allows you to set eggs at virtually any time (mark them carefully) since the incubator’s environmental parameters won’t need to be reset for hatching after 18 days. This approach also helps keep the incubator clean.
If you plan to hatch eggs on a larger scale, you might want to consider a forced-air, cabinet-type incubator. These devices offer a great deal of capacity and flexibility, but they are expensive.
With any hatching project, be sure that you have a place that you can leave the incubator undisturbed and out of direct sunlight for several weeks at a time. Most home incubators are designed to operate effectively at ambient temperatures from the 60s to the 80s.
Sanitizing Rinse and Storage Temperature
If you purchase fertile eggs from a hatchery, more than likely they will have been sanitized. However, if you are going to incubate eggs produced by your flock or you obtained eggs from a source that did not sanitize them, you can avoid potential health and viability problems with a sanitizing rinse. Using a capful of bleach to a gallon of water that’s warmed to about 110 degrees (substitute liquid dish soap or the recommended dilution of Tek-Trol), immerse each egg for a few seconds and air-dry.
Incubators and hatchers should be cleaned out after every hatch and sanitized after every third hatch at the very least. Dust or vacuum the interior and wipe all surfaces and trays with a dilute bleach solution (up to a quarter cup per gallon) or other sanitizer that won’t leave a residue or emit vapors that could poison a future batch of eggs.
Fertile chicken eggs can be stored up to 10 days (before incubating) with little loss in hatchability – as long as you keep them out of the refrigerator. The ideal storage conditions are 55 to 60 degrees Fahrenheit and 70 to 75 percent relative humidity. Store the eggs in trays, bowls or clean egg cartons with sufficient space to allow air to circulate. Some experts recommend turning the eggs in storage, too. This process can be easily accomplished by tilting the entire egg tray or other containers from side to side.
Candling Your Eggs
Candling is a process that allows you to determine whether your eggs are developing correctly after seven to 10 days of incubation. Candling takes a bit of practice to get right, but it is a great way to monitor the progress of your eggs.
Although you can purchase devices designed specifically for candling eggs, all you really need is a bright (preferably LED) white-light flashlight and a dark place. Ideally, the end of the egg should “seal” against the light – if your flashlight lens prevents this from occurring, you can make an adapter tube out of cardboard, or cut a hole in the lid of a cardboard box sufficiently small that it will cradle one end of the egg and hold it upright. A lamb nipple with the end cut off and pulled over a good pen light also works well. In any case, illuminate the egg (from below in the box setup) and look for a web-like network of blood vessels surrounding what is obviously a chicken embryo (by seven days you may notice embryo movement).
Clear space and a yolk, or a ring of blood (vessels are good, the blood ring is just a single ring), indicate that the egg was not fertilized or that it died during the early stages of development.

Note: It’s not unusual to lose up to 50 percent of the eggs you initially set depending on the quality of the eggs, the incubator model you use, and your diligence and skill. Eggs that aren’t developing properly should be discarded because there’s a higher risk that they could explode in the incubator – that’s a mess with which no one wants to contend.
Once the chicks hatch, you can leave them in the incubator or hatcher for a day or so before moving them to the brooder. Newly hatched chicks obtain sufficient energy from residual yolk that all they really need for the first couple of days of life is a warm environment – so there’s no need to rush them to the brooder.


