Instead of browsing the seed catalogs and picking out things that look interesting, I suggest you start deciding what to grow by consulting your grocery store receipts. What fresh or frozen produce do you buy regularly? Which are the most expensive? Use this information to pick your list. Add to that when we get to the companion planting step.
How Much Space Will You Need?
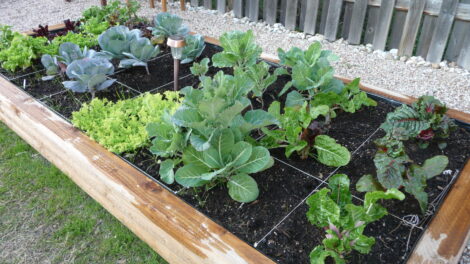
Each 4-foot-by-4-foot planting box is divided into 16, not-quite-1-foot squares. In each square, you’ll plant one type of vegetable or herb. How many go into each square depends on the size of the plant.
- Large plants, including tomato, peppers, cabbage, broccoli, cauliflower, and squash, will take up at least one full square for a single plant.
Trellising in a Square-Foot Garden
Some plants, like squash, will vine all over the place if left to do what they want. But they can be “trained” onto a trellis, so they grow vertically instead of horizontally. When trellised, each plant needs only one square. Tomatoes can be pruned to bush out or vine up onto a trellis.
When using a trellis, make sure you set it up on the back side of the box (farthest from the sunshine), so the trellis does not shade the rest of the plants in the box. I’ll talk more about building the trellis later, but for now, just decide which ones will be trained up a trellis and where they’ll need to go.
Companion Planting in a Square-Foot Garden
Some plants offer advantages to other plants when they’re grown in close proximity to one another. For example, some offer beneficial nutrient exchange, while others repel pests that the other are susceptible to. GRIT offers a great companion planting chart in its downloadable guide. Or, if you’re using the excellent Grit Garden Planner, information on companion planning is included for each vegetable and flower in the Info windows. Use this information to buddy up your crops.
Arrange by Height
As with the trellis, low-to-the-ground crops need to be in front of taller crops so all get their fair share of sunshine. Armed with all this information and how many boxes you have, you can decide how many crops you can grow, and how much of each.
Remember that you can re-use squares two or more times each season. You might put 16 radishes in one square early in the spring. They mature quickly, so after you’ve harvest them, plant carrots. When those are ready for harvest, plant spinach for a fall crop. In this way, one square can produce multiple foods.
Stringing the Box
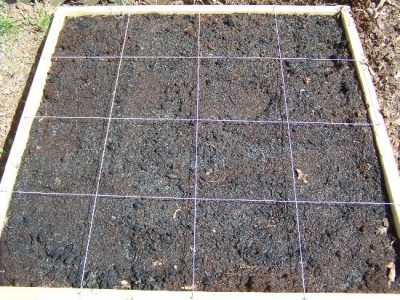
The Square Foot Gardening book shows the boxes divided up with strips of thin wood making the grid. This looks nice, but takes up more room and seems like they will get in the way when I have to add more soil components and mix them in next spring. So, I use nylon string. This string should not rot way too quickly — it’ll last one season anyway — and replacing it next year will be simple and cheap.
- If you made marks on the box sides as you built it, your nail locations are already set. If not, locate the center of each side and drive a 1¼-inch, exterior-grade box nail (large head), so that about 1/4 inch remains sticking up above the rail.
- Now, divide the space between these center nails and the side rail in half and drive in nails at each location. You should end up with three nails in each side, equally spaced. One last nail goes in a corner — be careful not to hit the nails or screws holding the corner together.
- Now, find the nail that is diagonally across from the corner nail and tie your string to that nail securely. Then, run the string directly across the box to the nail opposite the starting point. Pull the string taut, and wrap it around the nail a couple of times to help keep it taut. Then, hop over to the nail next to where you wrapped the string, go around that nail and back across the box.
- Wrap your string around that nail, hop over to the third nail on that side, round it and back across the box.
- Now, use the corner nail to get you around the corner and to the first nail in the adjacent side, wrap the string around the nail and shoot across the box. Use the same shoot across, hop down shoot across pattern to run the strings at 90 degrees to the first set and complete your grid.
- When you get to the last nail, which will be just around the corner from where you started, tie the string to the nail securely and cut the string loose from your spool. It should now look like the image above.
Setting Out Your Plants
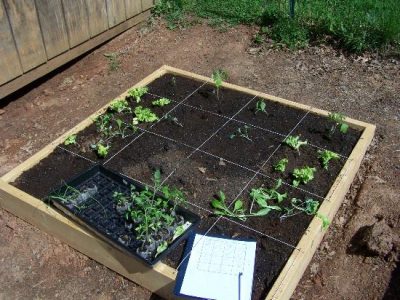
I highly recommend making a planting guide for each of your boxes. In the appendices of the All New Square Foot Gardening book, you’ll find a handy grid that can be photocopied and used for this purpose. If you don’t have the book, just draw one out on paper for each box. Label each page with the box number and which side of the box faces north (or your house or the creek or whatever you use as a landmark), then pencil in each crop name and the number to be planted in the square.
If you have been sprouting seeds indoors, set your seedlings into the soil. If starting from seed, plant the seeds according to the planting charts and put a check mark or date in the square so you know the seed is in. You may want to stagger plantings. Planting a square of radishes each week (or two) means you’ll have 16 fresh radishes coming out each week (or two), all through the season instead of having 80 radishes coming out all at once. Same with lettuce. Neither crop can be preserved; both are used fresh. Most other vegetables can be canned or frozen.
Labeling the square as having been planted with what and when helps you to avoid accidentally planting something else there, as well as knowing if something happened to your seed. If germination should take seven to 10 days, it’s been two weeks and there is no sign of sprouts, something may have happened to your seed and you may as well plant something else there. Reserve squares (or plant quick crops, like radishes) for the plants that have to wait for warmer weather.
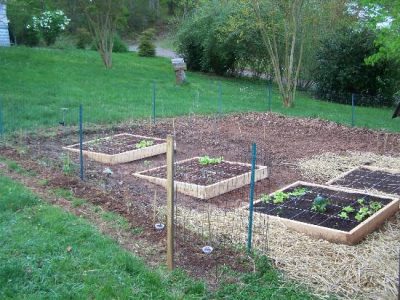
If your boxes are going into a former garden area like mine, you’ll want to lay in some straw, stone, or pavers around the boxes to help keep you out of the mud when working the garden after a rain. If you plunked the boxes down on top of a lawn, this should not be a problem (you did leave enough room between boxes to mow, didn’t you?).
Plant In a Grid for Square Foot Gardening
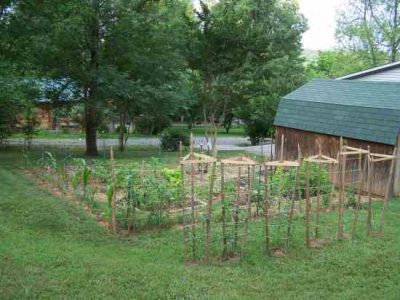
I’ll mention that not all of the vegetables I’m planting are going into the boxes. I have potatoes, corn, cucumbers, bush beans, watermelon, and added tomatoes, peppers, and squash that will go into the ground.
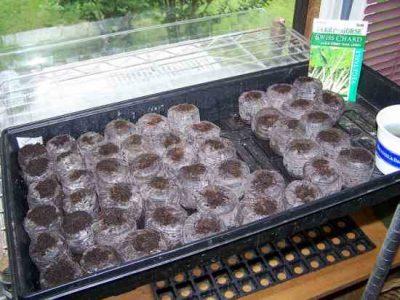
I’ve finally gotten the peat pellets I needed to start the next round of plantings. They ‘re the wrong size; the diameter of the compressed “pucks” is 1/4 inch too large to fit into the grippers in the tray, but I’ll work with them anyway. One advantage of these larger “pucks” is that when they are wetted and expand, they end up with a hole down the middle (think doughnut) that makes it a simple job to drop the seed right down inside. This would not be good for small seeds, but good for beans and chard.
I set up 18 pinto beans, 18 black beans, and 12 Swiss chard. I set the clear cover on top and set it in the window to make a small greenhouse that will speed germination of the seeds.
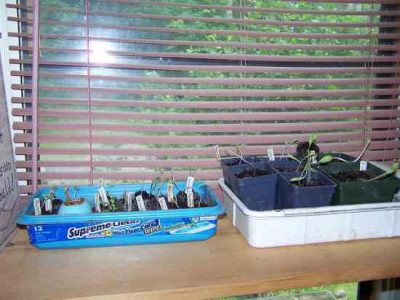
When the seeds sprout, I remove the peat pellets and their seedlings and put them in small planters with potting soil. Here, I gradually acclimate them to full sunshine while the first (baby) leaves are replaced by the plant’s initial mature leaves. After the small plant has been hardened off, I’ll take them out to the garden and plant them in the designated squares. The beans will go into the ground on the inside of the fence line, with the corn/cucumber row outside the fence.
These three play well together, but crop rotation will require doing something else next year as beans can be planted in the same place only once in every three years. Maybe the beans will go outside the fence and the corn/cucumbers inside next year.
Battling Bugs
Overall, the garden is doing well, considering that I’m new to this. My one major “fail” this year has been the cauliflower and broccoli. Looper worms ate the centers out of the plants, then started chewing holes in the leaves. After the centers were destroyed any chance of getting edible parts from there was gone, so I pulled them out.
The gardening sites say to prevent loopers, you must spray both sides of all the leaves with insecticide at least once a week. I avoid insecticides if I can, so I chose to sprinkle corn starch or rye flour on the leaves. When a bug eat this, the grain swells up inside them and causes the bug to burst. There’s a visual I don’t want to entertain! Adding a little salt or cayenne pepper helps to repel the bugs. I’ll give this a shot, and see if it helps on the second round of these plants.
Lettuce
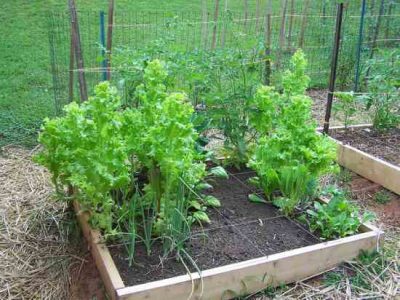
The lettuce is still prolific. My theory for why my lettuce grows so tall: Instead of waiting for the lettuce plant to get to 12 to 14 inches tall and cutting it off at the ground, I snip off the lower leaves and leave the plant to continue growing. This seems to encourage the plant to keep putting new leaves out on top and I keep snipping off the lower ones. Eventually, I get a lettuce tree! This works great for the leaf lettuce, head lettuce would be entirely different, and the Mesclun mix lettuce has all different shaped plants, some pretty bizarre looking, but they all taste great and make for a very interesting salad.
Squash
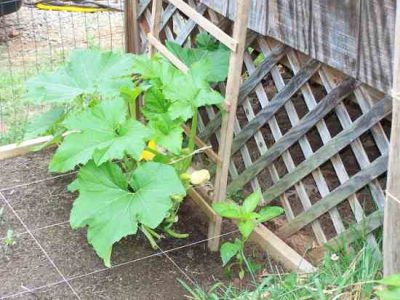
The squash plants are beginning to bloom and from the number of buds I see waiting to flower out, we will be pushing squash off on the neighbors and co-workers just like we are the lettuce. I’ve got yellow squash, summer squash and zucchini, but none of the bigger varieties like crook-neck or acorn; those would be just too much for my little garden!
Radishes
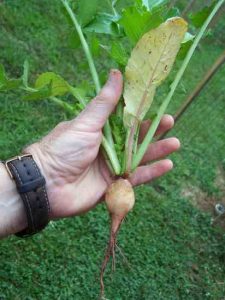
This year, I’m growing both red and white radishes. I’m sure you’re familiar with the red, ‘Cherry Bell’ radishes, but the white ones are rather unique. They’re white on the outside, red on the inside, and when sliced, look for all the world like hunks of watermelon.
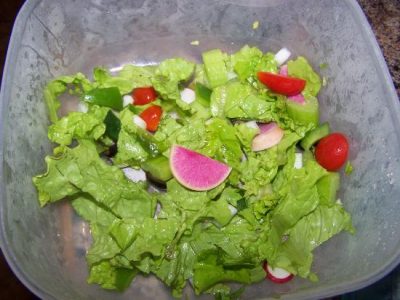
They taste like a radish, except they’re spicier than the red radish — so much so that nibbling on two of these as a snack gave me quite a case of indigestion! A little of these goes a long way. They are good in salads, though.
Tomatoes
The tomatoes have many blooms and a few green tomatoes the size of marbles. When they get to the size of golf balls, I’ll need to fertilize them with some ‘mater food. I’ve got a couple of green peppers almost ready to pick and many more in process. I have watermelon seedlings hardening off now that will go in the ground in another week or so. Everything else is coming along pretty well, and plant-chomping pests aren’t much of a problem, except as noted earlier, so I’m happy.
As the weather gets hotter, lettuce and spinach will have a hard time growing. The chard will grow well in the summer heat, as will peppers, tomatoes, and squash. After we reach mid-August, I’ll be ready to start another round of the cool-weather crops as well as Brussels sprouts.
And there you have it. Not exactly ready to set up a canning operation yet, but we are enjoying what we’re harvesting, and I’m having fun managing my micro-farm.


