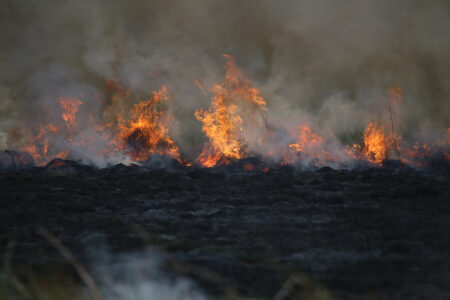
Weed control is made easy with pasture burning, but be sure to follow these pasture burning safety tips.
It’s springtime, and in many rural areas that means it’s time to burn pastures and native prairie remnants to release nutrients, rid the area of built-up dry vegetation, set cool-season weedy species back a few notches, and kill invasive shrubs and trees. You might not realize it, but the vast grasslands of North America were once maintained naturally by hugely destructive events such as fire set by lightning strikes and trampling effects of huge herds of bison moving through. In more recent times, fire was used by Native people to help control brushy encroachment and ostensibly to improve forage productivity. According to various state extension service publications, controlled burning has been in use for thousands of years to keep grasslands thriving.
Although it is still scientifically accepted as an important native prairie management tool, and culturally accepted as an appropriate and useful pasture and hay meadow management tool in many regions, the closer upwind you are located to a dense urban area, the more pressure there is to limit or even ban the burn. In some areas, a burn every year is beneficial, while in others every three to four years may make more sense. Check with your local grassland experts for advice relevant to your area, and, of course, check to be sure that you can legally use fire as a management tool–and take great care to comply with all local regulations and notifications.
Pasture burning safety tips
It’s best to check with your local extension office for ideal burn dates. Months before your planned pasture burn, you will want to start thinking about your plan of attack and general burn strategy. Walk the area and identify any natural firebreaks and routes for runaway fires to escape, and locate all fence lines, power lines and any structures or areas where fire would have a disastrous affect. Pay close attention to your perimeter fence lines–let your neighbors know what you plan and accommodate their concerns. Draw a sketch of the area and make note of any areas where the fuel is particularly heavy, such as a patch of cedar trees that could burn hot and drop flaming debris where you do not want it.
Next, define a boundary 8 to 15 feet from the fence line, or other hypothetical line, beyond which you will not let the fire progress, and create firebreaks–minimally you should mow the vegetation close all the way around the area to be burned. Do this in the fall to minimize remaining fuel in the firebreak. Alternatively, you can disc or plow your firebreak. Take advantage of natural firebreaks like creeks, ponds, roadways, rock walls, etc., whenever practical to do so.
Once you have the boundaries worked out and the firebreaks in place, it’s time to begin gathering equipment and assembling your crew.

Gather the goods
Depending on the size and complexity of the area to be burned, you might wish to invite three to six or more level-headed and physically able friends to help you burn. Ideally you will want three folks on each fire line–one to light and two to control the fire line. In some cases you will only need a single crew, while in others you may need two or more to ignite and control fire lines that will eventually coalesce. In large burns, you may wish to light two flank fires simultaneously after both crews work the back fire from the center of the line toward the flanks, for example.
You will need one propane-fueled Weed Dragon, drip torch or other flame source for each crew, as well as water sprayers, flat shovels, rakes and beaters (wet sacks are also fine). Be sure you have a steady supply of water and the means to deliver it to the crews as needed. Vehicles are useful for the transport of large tanks of water to refill sprayers in remote areas. Ensure that the entire crew is wearing cotton or wool clothing and leather boots and gloves. Goggles and facemasks are also recommended. Synthetic materials have a tendency to melt. Rubber footwear is fine if you are burning swampy or otherwise wet areas.
As the date window draws nearer, it’s time to obtain any permits required. Be aware that permitting and indeed burning where permits are not required is always dependent on the weather. And even then, you will need to monitor weather conditions directly preceding ignition all the way to burn completion.
Weather to burn
Calm winds in the 4- to 6-mph range on burn day are ideal. What’s key is that the winds not be too strong and that they not make any radical changes in direction for the duration of the burn. Stronger winds can yield spectacular explosions of flame, but they can also drive the fire beyond your intended barriers in a heartbeat. No matter how much you planned to burn today, if you assemble the crew at the site and the winds are swirling or escalating, you simply have to reschedule. If wind speed is greater than 10 mph, think twice about burning. If it is likely to pass 15 mph, cancel.
Temperatures below 80 degrees and relative humidity around 40 percent are ideal. Cancel the burn if relative humidity is below 25 percent, unless you have bulletproof firebreaks. If the relative humidity is well over 50 percent, you may have more difficulty getting a good clean burn and you’ll send more smoke into the atmosphere.
Once you are sure the weather is right, call your local authorities to let them know you are going to start a fire in short order. This way if someone calls because of the smoke, they will know to call you before sending out the fire department. Now it’s time to set and manage the backfire.

Light up
Gather the crew, and be sure everyone knows their role. Discuss the strategy and, if possible, ignite a small fire in a downwind corner of the area to be burned. Use this burn to watch how the fire responds to the wind and how your crew responds to the fire. Sometimes the difference between a successful burn and an out-of-control wildfire is a moment of panic. Now it’s time to light the backfire.
Light the backfire in the downwind corner or along the downwind edge of the area. The strategy with a backfire is to set a continuous line of fire along the downwind edge of the pasture–it’s best to ignite short lengths and allow the crew to snuff any flames that try to burn into or through the firebreak. Station a person or small crew where you begin lighting the fire, let it burn for a few inches or feet, and snuff the flames advancing with the wind. Slow and steady really helps here. It’s prudent to have plenty of water, a sprayer, and flat shovels or canvas beaters soaked in water to put out flames that want to advance ahead of the wind. Once you have snuffed them, the fire will slowly burn upwind and create an ever widening firebreak. Depending on how secure your firebreaks are, you will want to work the backfire around to the edges of the field. The person(s) you left at the beginning point can begin to work their flank upwind, keeping the fire from crossing the firebreak, while the backfire setting crew can work the opposite flank. Under ideal conditions you can monitor the back and edge fires before lighting the head fire. When you are satisfied that the head fire cannot escape, it’s time to light it.
Fanning the flames
Lighting the head fire is as easy as dragging the burner along the upwind edge of the area you want to burn. You will soon discover that snuffing the portion of the fire that wants to burn across the firebreak is much easier than when lighting the backfire. Once again, use beaters and a water sprayer to keep the fire from heading upwind, but also be aware that the head fire itself can generate sufficient heat to make it difficult for you to be within 20 to 30 feet of it. Fanned by the wind, the head fire will race across the field in a spectacular display of flame, smoke and heat until it hits the back and flank fires, when POOF, it all goes out. Wow, that didn’t take long. You’re done, right? Not quite.
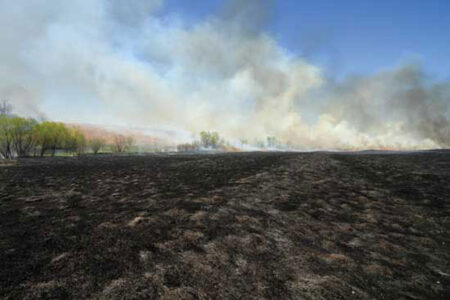
Mopping up
Pasture burning is never finished until you have mopped up all the smoldering hotspots, because should the wind pick up, the embers they create could fly downwind and start another fire beyond the boundary.
Mopping up is readily accomplished with a water sprayer and shovel. Simply walk or drive the area with a utility vehicle looking for smoke. Flood those smoldering mounds with water; if they are cow pies or heavy root crowns, you might need to break them up with a shovel as you wet them down. In time you will have it all out, and only then can you leave the field and call the authorities to let them know your burn has been safely concluded.

No burn is truly complete without some level of evaluation. Immediately consider how your plan was executed and how the fire behaved compared with how you thought it would behave. Did you achieve that brushy vegetation control? A month or six weeks after the burn, walk the pasture to look for any weeds that need to be controlled by other means and to marvel at the lush green and largely treeless growth. Repeat the burning process as recommended for your area.
Want to learn more ways to manage your property? Check out these great uses for an under-utilized farm pond.
Hank Will raises hair sheep, heritage cattle and many varieties of open-pollinated corn with his wife, Karen, on their rural Osage County, Kansas farm. His home life is a perfect complement to his professional life as editor in chief at GRIT and Capper’s Farmer magazines.


