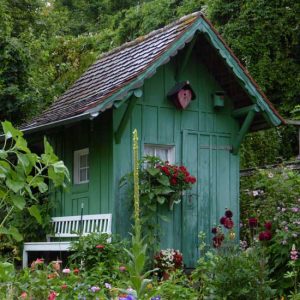
Depending on the status of the current infrastructure on your farm, the time will probably come when you need to build a new shed. Before reaching for your toolbox, there are a few things you may want to consider. How much space do you need? Where is the ideal location? What is the primary function of the new shed?
Whether you are in need of more space for garden tool storage,
cold storage for produce or office space, here are some simple guidelines for building your own shed.
Steps to Building a New Shed
1. Define your purpose and goals
Before building a new shed for your farm or homestead, identify what purpose the shed will serve, as well as your main goals for the project. This will help you determine what features you need and how complicated your DIY shed project will be.
Then, pick out a specific design and blueprint. You can browse different shed plans for specific features or look elsewhere online for more basic setups. Your shed will hopefully become a permanent fixture, so now’s your chance to customize the project to your liking.
2. Choose a site
Once you have determined what kind of shed you want to build, you’ll need to figure out where to put it.
The placement of your shed will depend on a number of factors. Is the new location easily accessible? Is it close to the areas you will be working in? Is the surface level? Are there any special circumstances that play into your decision?
3. Check for permits
Before you bring out the nails and hammer, you will want to check and see whether you need a building permit. Permits will vary based on location, and most sheds under 6×8 feet
do not require a permit.
However, it only takes a moment to do some preliminary research and save a headache down the road.
4. Lay a foundation
Like any permanent structure, your shed’s foundation is extremely important. Regardless of the type of flooring, you are investing in, be sure to pay close attention to laying an even foundation.
A concrete base works in most places, though be sure to check for any special circumstances your site may require. While pouring your own concrete may sound intimidating at first, there are tons of
online resources to help you through the whole process.
5. Raise the frame
Whether you are constructing a shed from scratch or following a plan, you will want to make sure your frame is square before continuing on to the next step.
Building a frame requires a diverse set of tools, so make sure you have everything ready to go before you begin!
6. Add the roof
The type of roof you choose in your shed’s design is probably equal parts style and function. Depending on your environment, be sure to consider the slope, both the grade and direction.
Ventilation and precipitation are two important considerations when adding the roof.
7. Install windows and doors
There are many options to consider when choosing the right windows and doors for your shed. There are four general
styles of doors for sheds: hinged, sliding, bi-fold and roll-up. For windows, the installation will vary widely based on the main function of your shed.
If the space will mostly be utilized for storage, you may find that your shed does not require any windows. However, if you are including windows, be sure to use either aluminum or vinyl frames for weather-resistance and overall longevity.
8. Assemble additional features
When you choose a design for your shed, you probably have a couple special circumstances or features that you would like to personalize.
Some of these may require professional help, such as installing electricity or heat. Other DIY features may involve installing shelving or a rampway entrance. Whatever the feature, make sure that your shed is set structurally before assembling.
9. Use it!
With your new shed ready to go, it’s time to get started on filling it with whatever materials you want. Whether it is going to function as a farm office or simply for storage, the possibilities for your new shed are endless.


