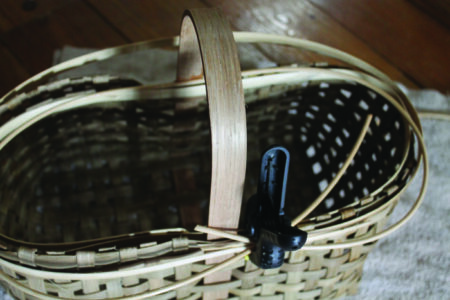
Create a useful and beautiful object with your hands by learning how to weave a square basket.
Basket weaving is an ancient, practical art. It’s difficult to pinpoint the exact origin of baskets because they’re made out of soft materials, but archaeologists believe basket weaving has been practiced for thousands of years and that baskets predate pottery. Cultures around the world have created and used baskets to gather, store, and transport supplies; catch fish; carry babies; and more. These beautiful containers were also used in ceremony and commerce. While pretty much all cultures have some form of basket weaving, baskets made by different cultures vary considerably in design, materials, and uses. The method I share with you here is adapted from Appalachian white oak basket-making. This method would traditionally use white oak split, and I adore this style of basket. However, the methods used to obtain the white oak splits are significantly more complex and involved than using split reeds. We’ll start here with reeds to allow this to be an easier introduction to basket weaving.
What You’ll Need to Build This Basket
- 8-by-12-inch D-shaped handle
- 1/2-inch flat reed; my basket sides are 7 inches tall, and the bottom measures 8 by 12 inches; my bottom has nine reeds running crosswise to the handle (34 inches long) and 14 reeds (30 inches long) running the same direction as the handle; there will be seven reeds on each side of the handle
Supplies
Basic tools: You’ll need sharp scissors, pliers, a tape measure, a pencil, clamps, a large rubber band or a zip tie, and a small flathead screwdriver. You’ll also need a vessel in which to soak your reeds to soften them for weaving. At home, I just use my bathtub, but a bucket works well too.
Reeds: This is the material you’ll use to weave your basket. Reeds come in many different sizes, and the size is often determined by how you want to use your basket. Thicker, sturdier reeds will create a heavy-duty basket. Thicker reeds are also typically used for the bottom “splits” of baskets. Splits can be seen as the skeleton, or foundation, of your basket, and they help support the weight of what you carry in it. The weavers – another form of reed – are strips of pliable material that you repeatedly put over and under the splits to fill in the bottom and sides of the basket. Weavers are generally smaller, thinner, and much more flexible than the rest of the basket materials.
You’ll also use thin reeds that go around the inside and outside at the top of the basket to bind the rim in place. These are generally made from a reed split in half. They’re very stiff and more challenging to work with. On top of the rim is a final round reed that’s also quite stiff. This last reed isn’t required, but it visually finishes up the top of the basket and helps protect the rim.
Buy your materials from a reputable basket-weaving supply company. One time, I made the mistake of purchasing from an online auction site, and the materials were low-quality.
Keep your materials dry and stored out of direct sunlight. If they’re stored in moist conditions, the reeds and other supplies can mildew or rot. If you’ve soaked more material than you can use, allow it to dry thoroughly before storing.
Handle: Think about how you want to use your basket. You might want a wooden handle. Buy handles that are tongue-and- groove and not just glued together; they’ll be stronger and last longer. Hickory or white oak handles are very durable.
Setup
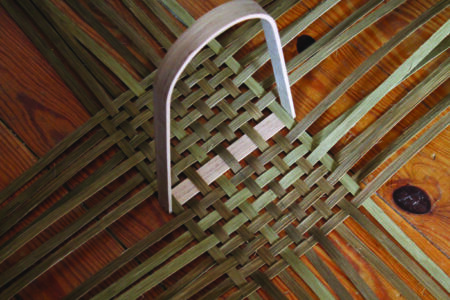
Let’s start with some measuring. Pick out your handle and measure across the bottom span. Divide this in half and mark a line across it with a pencil. This is where your first bottom split will go (see Figure B). Next, measure perpendicular across the bottom of the handle for the desired length of the basket, and record this measurement. Finally, measure up the sides of the handle to determine the height of the basket sides.
Now, add your bottom length and two sides, and add an extra 6 to 8 inches for tucking your ends in. Here, our basket length is 16 inches, the sides are 5 inches, and we add an extra 8 inches, so the equation will be 16 + 5 + 5 + 8 = 34 inches, and you’ll cut the bottom splits into 34-inch lengths.
To figure out how many splits to cut, first note that you’ll always have an odd number of splits on the bottom of the basket perpendicular to the handle. Take the width of the handle bottom and divide this by the size of your splits (for example, 1/2-inch-wide splits). You’ll want a small space between each bottom split, so plan for a bit of extra room. The size of these gaps can serve different purposes. Wider gaps between bottom splits make it easier to clean out debris from your basket. Tighter spaces will make a better basket for picking berries and similar tasks. Mark the middle (lengthwise) of each split with a pencil.
I’d recommend making your first project with 1/2-inch reed. You could use a larger 1-inch reed for the bottom if you’d prefer. This would make a hardy basket, but the larger reeds are more difficult to work with. They might be perfect for your second or third basket.
Soak the Reeds
Soak your rolls of reed for 15 to 30 minutes before starting your project. Make sure they’re submerged in clean, cool water. If the reeds begin to dry out while you’re weaving your basket, spray them down with water or gently resubmerge them in a bucket of water. Don’t try to weave dry reeds – they’ll split and break on you.
There are two sides to a reed. One side is smooth, and the other side is rough. Some reeds are so well-made it’s hard to tell smooth from rough, but if you fold the reed in half, the side that splinters up is the rough side. As you work, the smooth side of the reed will always be on the outside of the basket, and the rough side will always be on the inside. This is important so your reeds don’t break. Mark all of your measurements inside the basket, on the reed’s rough side.
Weave the Bottom
Start by placing a bottom reed over the basket handle on the base of your basket. Carefully line up the middle marks on each reed with the middle of the handle. Place the next reed beside the first under the handle bottom. Alternate sides until you reach the edge of the handle bottom. Always place the last bottom reeds on top of the basket handle’s base (not under it). This is why your bottom length will always need to have an odd number of splits. It’s helpful to place a small board on each end of the bottom reeds to hold them in place while you begin to weave the bottom of the basket.
Again, measure the width of the bottom, and then add your two sides and an extra 6 to 8 inches. Cut and mark the middle of the required number of splits. Pick a side of the basket handle to start from, and place the split over the middle split (the first one you put in). Alternate over and under until you reach the end of the length you’ve decided on. It’s important that you make any spaces approximately the same between each split. Repeat on the other side. Use a tape measure to help get the size you want and to ensure the opposite sides are equal. Adjust the reeds on each side of the handle as needed until you get the same measurements.
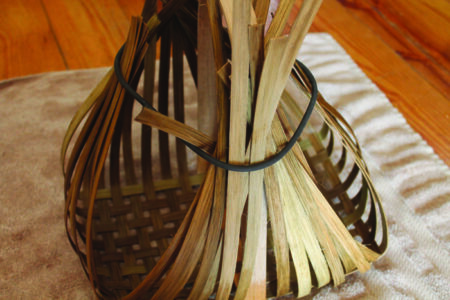
Now, make sure these bottom reeds are thoroughly wet, because you’re going to bend the reeds back on themselves. Mark a straight line on all four sides where the bottom edges of your basket will be. Gently bend the reeds back on themselves. This will create your sides. I use a large zip tie or strong rubber band to loosely hold the reeds upright while they dry. This step will make the rest of your weaving go much smoother!
Weave the Sides
You can make your side weavers from the same size, or you could start with larger ones and gradually reduce to smaller ones as you work your way up the sides. Soak your weavers and start to weave around the basket, starting your first reed in front of the handle. Leave extra length to tuck this end in. Cut a generous length (make sure it will go around the entire basket and add an extra 8 inches). Alternate in front and behind the vertical reeds all the way around. The first couple of rows will be the most difficult. It’s easiest to loosely weave and then tighten when you get to the end. Using small clamps is helpful when you’re beginning your sides. Carefully push each weaver down tightly toward the reed below it using a small flathead screwdriver. Go slowly and don’t rush the first few rows. Make sure everything is even. This will ensure your next rows weave evenly.
Finish the Basket
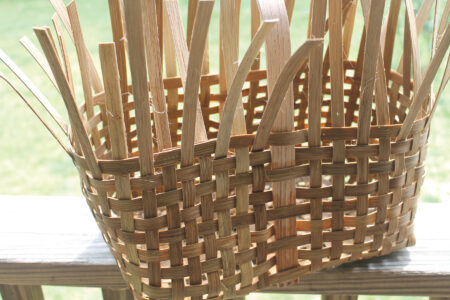
Continue all the way up the sides of your basket. Straighten and adjust as you go. The farther up you go, the easier weaving will be. Once you get to your desired height, trim the splits. Cut the splits on the outside of the basket 4 inches above the top and at an angle across the reed. Cut the ones on the inside of the basket flush with the last woven row. Re-wet your reeds if necessary before this next step: Gently fold the 4-inch splits over to the inside and slide each one inside the next inside row. Continue around the entire basket.

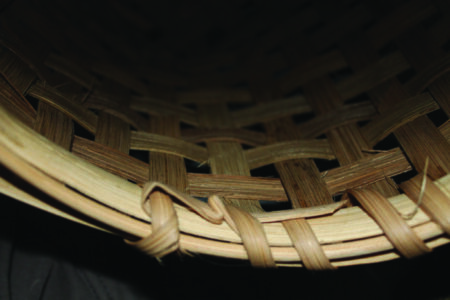
The basket rim is slightly tricky. Your basket has both an inside and outside top rim. Measure around both of these and add 2 inches to each. Next, cut these lengths from the 1/2-inch half-round reed. Taper the ends so they fit evenly over the other by at least 2 inches. On the inside rim, you’ll be bending the half-round reed against its natural bend, so keep this in mind when tapering. Soak your reeds well and clamp them in place on the basket top (see above, figure E). Now, measure (adding 2 inches) your round reed, and again taper both ends. Soak and clamp this in place on top of the basket rim. Next, soak some 1/4-inch weaver. Cut 2 to 3 feet of the 1/4-inch weaver and slide the end up under the basket half-round rim and wrap the rim twice (see above, figure F.). Tuck any excess under the rim. Begin to “sew” the weaver over the top of the rim and into the holes from the last row. Continue around the whole rim (adding another weaver if necessary). Tuck any loose ends under the rim and double wrap for security (see figure G).
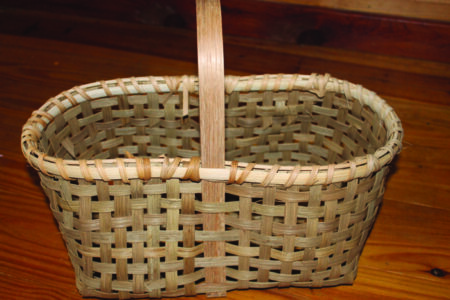
Keep your baskets dry and out of direct sunlight and they’ll last for generations. If repairs are needed, simply soak and replace the reed. Enjoy your new skill!
Jenny Underwood is a homeschooling mom of four who lives in a fifth-generation homestead in the Missouri Ozarks.
Originally published in the September/October 2025 issue of Grit magazine and regularly vetted for accuracy.


